Blog Archives
Pointless Tutorials: How to build a jigsaw puzzle
Since I was already going to build the puzzle that I got for our new birthday tradition, I figured that I’d offer to you, my dedicated readers (hi mom!), a pointless tutorial on how to build a puzzle. Here goes.
Step 1: Get a puzzle. You can buy one or borrow one. I have never heard of puzzle rental, although you can find anything on the internet these days, so it’s worth a google if you’re interested. Please do not steal a puzzle as we here at Coolest Family on the Block do not condone any form of thievery (even if we think that pirates are cool…cause they are). This includes “borrowing” one from someone without first asking permission. Your mom would be so disappointed in that behavior.
Step 2: Open the puzzle box. This could get tricky. If it’s a brand new puzzle they aren’t easy to open. Explosives work best. If you don’t have any explosives, then I recommend having a responsible adult use a knife or scissors to open it…be very careful. If the puzzle that you have has been opened before, the integrity of the strength of the bottom box may have been compromised, particularly if the puzzle is old. This can result in puzzle pieces going everywhere when you attempt to open the box. You likely will always be missing at least one piece no matter how hard you look or how often you clean. That is, of course, until your pet or small child finds the missing piece and swallows it. Don’t worry, they could probably use more fiber in their diet any way.
Step 3: Sort out the straight edge pieces from the rest. Seriously, I’m not joking here. Everyone knows that this is the proper way to commence puzzle building. Any other way will be shunned. Shunned I tell you.
Step 4: Build the border of the puzzle. Use all of those straight edges that you sorted out. You will likely have to search for more straight edges, they’re elusive little buggers. You’ll probably have to rebuild some of the frame because you thought that you had all of the pieces and you were putting things together that didn’t belong. Try not to tear the nub of the puzzle piece off as your twisting it from its improper mate. Be more careful next time.
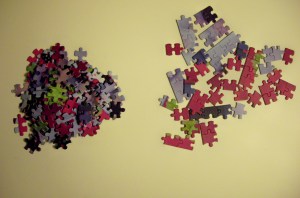
Step 5: Separate the remaining puzzle pieces into piles of like patterns and colors, just because it makes my little obsessive-compulsive heart sing. If you have built puzzles in the past by just diving your hand in and picking up a random piece as though it were a bag of potato chips, never find anything that fits together, give up and then go get a real bag of potato chips…this is the reason why puzzle building has been a source of frustration for you. Give the puzzle the respect it deserves and follow the system you animal.
Step 6: Choose a pile and start putting those pieces together. Starting with a pile that matches a section of the border is always a good way to go. Start from the border and work your way in. If you have a subject in the puzzle such as a person or animal it’s also an option to build the face and work your way out (that’s what I did with this puzzle). Continue to do this until you’ve used all of the pieces to copy the photo on the box.
Step 7: Put in the last piece of your puzzle.
Congratulations. Your puzzle is now complete. The world will begin to make sense to you now. Do a celebratory dance.
Yes. Puzzles are awesome.
The End.
A “Puzzling” Birthday Tradition
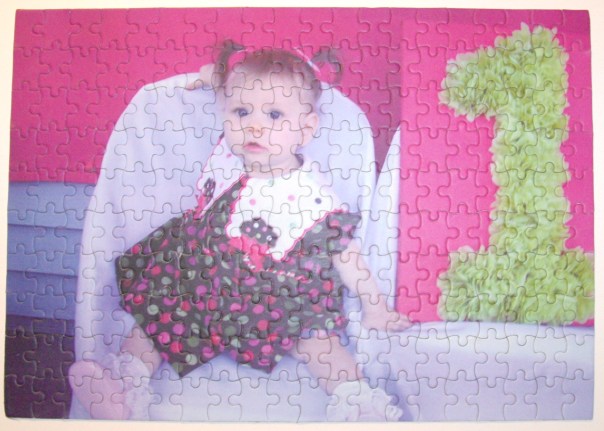
I love puzzles. Building puzzles is something that my mom and I have always loved to do together. When I saw that ArtsCow.com was offering 200 piece photo puzzles for $9.99 shipped…I knew I had to get one made for Adaline’s birthday. I chose the following photo from her birthday party.
I received the puzzle in the mail a few days ago. I decided to build it to make sure all of the pieces were there. Here’s the final result.
Yay, all the pieces were there! I think this is something that I’d like to do for birthdays every year (and maybe Christmas too!). (Once they’re old enough) during the month leading up to the child’s birthday they can build their different birthday puzzles. Hopefully they’ll enjoy building puzzles with their mommy as much as I did! If not, I guess my mom and I will just build them anyway in honor of the birthday kid.
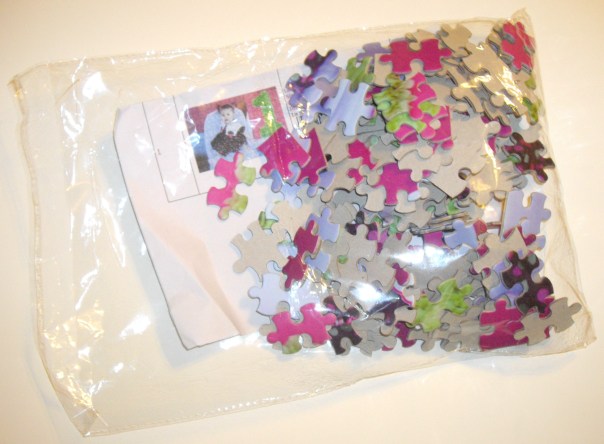
My only problem with the puzzle was that it didn’t come with a box. I didn’t know that. It didn’t say anything about a box, but I just assumed (my first mistake). It didn’t even come in a box, it was shipped in a bag. And the bag isn’t even a resealable one 😦
Right now I’m keeping it in a zippered plastic bag. I’m wondering if I should try to find/make a box to resemble a puzzle box or just do a plastic container with a copy of the photo on it. Any suggestions?
If you are intrigued with how I was able to solve this mind-boggling 200 piece puzzle you might want to check out Pointless Tutorials: How to build a jigsaw puzzle so that you too can become a puzzle building mastermind like myself.
Good day to you.
P.S. I’m sorry to tell you that the $9.99 shipped deal for the puzzles is over now. They always have something going on sale, so if you’re interested sign up for their emails.
Posts COMING SOON…
Balloon Wreath Tutorial and Links Post
Ladybug Picnic Centerpiece Tutorial
Free Ladybug and Bug Fonts Links Post
Ladybug Picnic Products List
(I’ll be creating a separate post that contains all of the info and links for the supplies from this party. In the meantime if you want to know where I got something just ask in the comments.)
Related Posts
BIRTHDAY TRADITIONS
*Birthday Traditions: Personalized Birthday CD
*Birthday Traditions: Knife and Cake Server
*Birthday Traditions: Professional Photos
*Birthday Traditions: Photo Puzzle
*Happy 2nd Birthday, Adaline!
BIRTHDAY TUTORIALS
*DIY No Sew Party Hat Tutorial

*Ribbon Topiary Video Tutorial (Centerpiece)

*Tissue Number Birthday Sign (Mini-Tutorial)

BIRTHDAY PARTIES
*Birthday Girl…2 years old: Photos of Adaline at her birthday party
*Ladybug Picnic: 2nd Birthday

*Pink and Green Polka Dots and Cupcakes Party: 1st Birthday

*Ham and Man Party: 30th Birthday

*Celebrating 30 years in 30 days! All of my birthdays from 1980-2009
+Birthday posts will be published all throughout September 2011 including tutorials, party decor ideas, and birthday traditions!

Coolest Family on the Block is committed to helping you find creative ways to have fun and make memories with your family all year-long. Don’t miss an idea, tip, or trick…subscribe and have updates sent directly to your email!


