Blog Archives
 Traditions")
May Day (May 1st) Traditions


May 1st is “May Day”! On May Day there is a tradition of leaving baskets of flowers or goodies hanging on your neighbors’ doors anonymously. Other ways to celebrate May Day include the Maypole, building fairy houses, making/wearing a floral hat or wreath, and even a Magic Jellybean Lollipop Garden (a tradition that my family does for Easter). Below you will find a round up of May Day ideas from around the web including traditions, maypole tutorials, May Day treats, and free May Day printables.
You can find inspiration and tutorials for May Baskets on my May Day pinboard. A May Day Basket post will be coming someday. Maybe tomorrow, maybe next year. Who knows?! (I sure don’t.)

MAY DAY TRADITIONS
*6 Ways to Celebrate May Day: @ WikiHow
Adding a Maypole to Your Backyard, Warming Up By a Bonfire, Trying Other Dancing, Enjoying May Day Food and Drink, Celebrating May Day with Flowers, Trying a Little May Magic

*The Most Fun May Day Traditions: Magic Morning Dew, Fairy Houses and Foliage Accessories: @ BunchFamily.ca
*Jack in the green: @ Wikipedia.org

*Creating Summer Hats: @ Creative Connections for Kids

*May Day Flower Headband Tutorial: @ Simple Simon and Co.

*May Day – Magic Jelly Beans: @ Nothing But Country

*Super Mommy Secret~May Day Tradition: @ Secrets of a Super Mommy
*An Old-Fashioned May Day Celebration: @ Mrs. Gore’s Diary

*Montessori Inspired May Day Activities: @ Living Montessori Now
A great collection of links to May Day Activities

*LOCAL SPRING FESTIVALS!
Check your local community to see if they are hosting a spring or May Day festival!
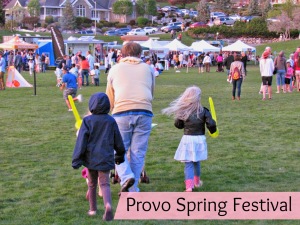
Adelina from @ Home Maid Simple shared her family’s trip to the Provo Spring Festival complete with Maypole dancing!
*Carrying on the May Day Tradition: @ Omahaha

MAYPOLES
*Paper Towel Roll Maypole Craft: @ DLTK-Kids

*Children’s Maypole Tutorial: @ Mommy Blessings
![02 Spring 1609_thumb[1]](https://coolestfamilyontheblock.com/wp-content/uploads/2014/04/02-spring-1609_thumb1.jpg?w=203&h=300)
*Making a Maypole: @ MarthaStewart.com

*Maypole Dancing and DIY Maypole: @ How to Run a Home Daycare

*May Day and DIY Maypole: @ Montessori Mischief
They used a tall floor lamp as a maypole!


MAY DAY TREATS AND SNACKS
*DIY Mini Maypole Cakes: @ Studio DIY
Cute Maypole bundt cake made with a stripey straw and ribbons.

*May Day Cupcakes: @ Cupcake Project

*Maypole cupcakes: @ Martha Stewart

*Maypole Cake: @ Fiskars


MAY DAY PRINTABLES
*Start a May Day Tradition with these Free May Day Printables: @ Happy Money Saver

*May Day Surprise: @ Creative Preschool Resources
Free printable tag

*Free Printable May Day Gift Tags: @ Skip to My Lou

*DIY Printable May Day Basket: @ Alpha Mom

*Printable May Day Basket Template: @ Printables4Kids.com

*Free Printable May Day Basket (cone): @ The Neighborhood

*May Baskets Poem and Poster / Coloring Sheet: @ DLTK

Do you celebrate May Day? What’s your May Day tradition? Let me know in the comments!


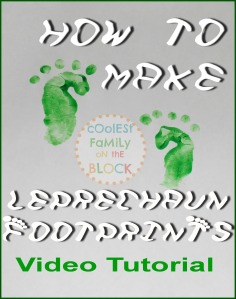
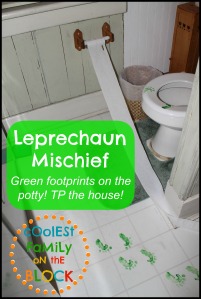
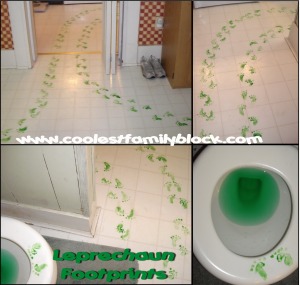
How to Make Leprechaun Footprints: Video Tutorial

How to make leprechaun footprints: video tutorial
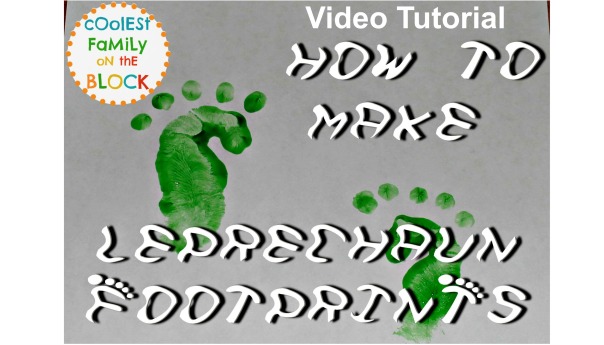

Here’s a quick video tutorial showing you how to make the leprechaun footprints that you see in these posts:
*Leprechaun trickery is afoot! and
*St. Patrick’s Day Tradition: Leprechaun Footprints.
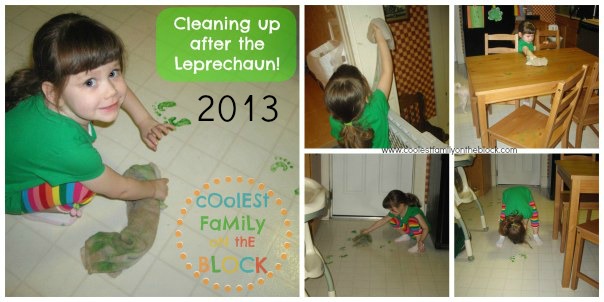
I also included some footage of Adaline discovering the mess the leprechauns made in 2013.
(Watch video here)
To make leprechaun footprints:
-Put green Crayola washable fingerpaint on a plate, piece of paper, or thick paper towel
-Make a fist and dip your hand into the paint (dab off the excess)
-Press your fist onto your surface of choice
-Use your pinky finger to make toes
-Repeat using other hand
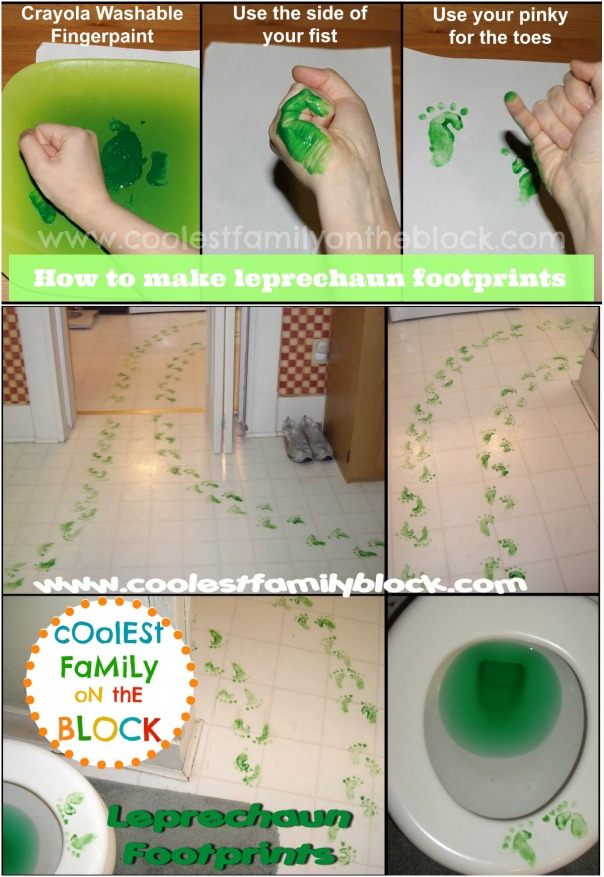

More details:
-It takes me about 45 minutes to make the mess.
-I do ALL of the prints for one foot/fist at the same time so that I don’t have to keep switching hands.
-It takes about 5 minutes to clean up the footprints.
-The footprints wipe off easily with water. You may want to use some soap if the paint was on long enough to dry.
-My daughter enjoyed cleaning up the footprints.


Has a leprechaun ever visited your house? What kind of things have your kids thrown in the toilet? Let me know in the comments!

*March Holiday Traditions

*Leprechaun Visit 2013: Little green footprints!
*Leprechaun Visit 2011: Magic green milk, footprints, and more!
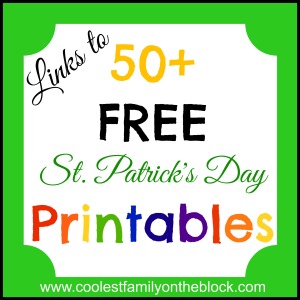
*50+ FREE St. Patrick’s Day Printables (Links)
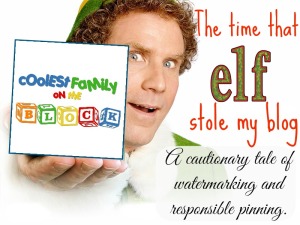
*The time that Buddy the Elf stole a picture from my blog!
*30+ April Fools Pranks You Can Play on Your Kids!
Great for Leprechaun tricks and Elf mischief as well!

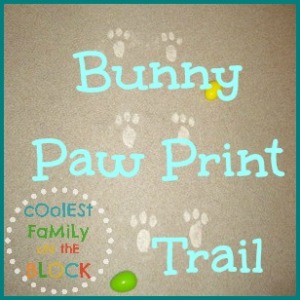
*Easter Bunny Tracks: Paw Print Trail!
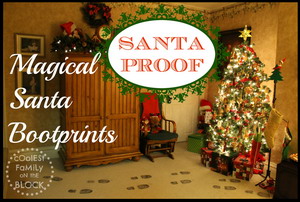
*Santa’s Magic Sooty Bootprints!
This post is linked to…
SITS craft link up / SITS Sharefest /Kids Activities Blog: St. Patrick’s Day
How to Fold a Towel (Video Tutorial)
I’ve added this to Mama’s Kat Vlogging Workshop as prompt
3.) Make a video about anything…from a table in your kitchen.
Coincidentally I had just made this video last week for No Housework Day. Our kitchen light doesn’t work so I moved the table into the playroom to record the video. Enjoy 😉
I dislike all housework but if I had to pick a favorite chore it would be the laundry. I don’t mind laundry so much. Maybe it’s because there’s really no gross factor like there is with dishes. Maybe it’s because there are only four of us and the laundry is pretty manageable. I don’t know.
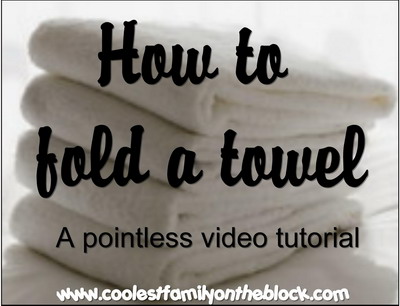
I’m actually really good at folding laundry, so I thought I’d show you how to fold a towel. I know, it’s exciting isn’t it? I like to rock a nice, fancy tri-fold with my towels. Also, I fold in the shadows because I am mysterious (or because I have crappy lighting in my house). Watch and learn, my friends, watch and learn.
(Email and feed readers click here to see the video.)
…and. You. Are. Welcome.
I just changed your life.
Spread the word.
If you’re looking for another pointless tutorial you can check out this ooooold one of mine: How to build a jigsaw puzzle.

How do fold your towels? Tri-fold, square, origami elephant? Tell me in the comments!
Don’t forget to link up your housework (or anti-housework) related posts to the No Housework Party April 05-12, 2013!
You can “like” the No Housework Party on Facebook, party with @coolfamilyblog and @nondomestic on Twitter at #nohousework, and follow our Non-Domestic and No Housework boards on Pinterest!

Related Posts:
*My Least Favorite Chore
*10 Things I’d Rather do Than the Dishes

Check out my other vlog for Mama Kat’s prompt #2
Something interesting you received in the mail

Coolest Family on the Block is committed to helping you find creative ways to have fun and make memories with your family all year-long. Don’t miss an idea, tip, or trick…subscribe and have updates sent directly to your email!


Tissue Number Birthday Sign (Mini-Tutorial)

I get a lot of compliments, comments, and questions about the Tissue Number Birthday Sign that I made for Adaline’s First Birthday Party. I tried to include all of the links in the original post, but I thought this deserved a post of its own. This is only going to be a “mini” tutorial, which means I’m going to tell you how I made it but you’re going to need to go to the original website for step-by-step instructions.
I found the tutorial for the tissue paper sign here: Prudent Baby
Basically what I did was:
1. I bought an artist’s canvas from The Hobby Lobby
2. I bought a pillowcase and sheet set from Target
(Obviously you can use fabric, but we don’t have a fabric store nearby so I improvised.)
3. I cut one of the pillowcases and stapled it to the canvas
4. I cut tissue paper flowers. Details found here
(Mine looked awful at first…took me awhile to get the hang of it.)
5. I used chalk to make an outline of the #1 on the pillow case
6. I twisted the bottoms of the tissue paper flowers and hot glued them to the pillow case inside the chalk outline.
7. All done!

Like I said the original tutorial that I found and used was Prudent Baby DIY Tissue Number Birthday Sign, they give details and show pictures of how to make it.
NOTE: Apparently WordPress hates me and it keeps breaking my links to the Prudent Baby website. I keep fixing them and it keeps breaking them again. Here are some ways you can hopefully fix that.
1. Click on one of the links to Prudent Baby and if it comes up saying the page doesn’t exist add .html to the end of the url in your browser. I keep doing this within this post and WordPress keeps erases the .html part 😦
OR IF THAT DOESN’T WORK
2. If the two following links don’t work when you click on them try copying and pasting them into your browser (separately of course).
http://www.prudentbaby.com/2010/06/diy-tissue-number-birthday-sign.html
http://www.prudentbaby.com/2010/06/diy-tissue-garland.html
OR IF THAT DOESN’T WORK
3. Go directly to the Prudent Baby homepage at http://www.prudentbaby.com (If that link doesn’t work just copy and paste the url into your browser.) Then type DIY Tissue Number Birthday Sign or DIY Tissue Garland into their search box (currently on the top right sidebar) and links should show up and hopefully work 🙂
Sorry for the inconvenience. I’ve never had this trouble with any other links before.

Posts COMING SOON…
Balloon Wreath Tutorial and Links Post
Ladybug Picnic Centerpiece Tutorial
Free Ladybug and Bug Fonts Links Post
Ladybug Picnic Products List
(I’ll be creating a separate post that contains all of the info and links for the supplies from this party. In the meantime if you want to know where I got something just ask in the comments.)
Related Posts
BIRTHDAY TUTORIALS
*DIY No Sew Party Hat Tutorial

*Ribbon Topiary Video Tutorial (Centerpiece)

*Tissue Number Birthday Sign (Mini-Tutorial)

BIRTHDAY PARTIES
*Birthday Girl…2 years old: Photos of Adaline at her birthday party
*Ladybug Picnic: 2nd Birthday

*Pink and Green Polka Dots and Cupcakes Party: 1st Birthday

*Ham and Man Party: 30th Birthday

*Celebrating 30 years in 30 days! All of my birthdays from 1980-2009
BIRTHDAY TRADITIONS
*Birthday Traditions: Personalized Birthday CD
*Birthday Traditions: Knife and Cake Server
*Birthday Traditions: Professional Photos
*Birthday Traditions: Photo Puzzle
*Happy 2nd Birthday, Adaline!
+Birthday posts will be published all throughout September 2011 including tutorials, party decor ideas, and birthday traditions!

Coolest Family on the Block is committed to helping you find creative ways to have fun and make memories with your family all year-long. Don’t miss an idea, tip, or trick…subscribe and have updates sent directly to your email!
Pointless Tutorials: How to build a jigsaw puzzle
Since I was already going to build the puzzle that I got for our new birthday tradition, I figured that I’d offer to you, my dedicated readers (hi mom!), a pointless tutorial on how to build a puzzle. Here goes.
Step 1: Get a puzzle. You can buy one or borrow one. I have never heard of puzzle rental, although you can find anything on the internet these days, so it’s worth a google if you’re interested. Please do not steal a puzzle as we here at Coolest Family on the Block do not condone any form of thievery (even if we think that pirates are cool…cause they are). This includes “borrowing” one from someone without first asking permission. Your mom would be so disappointed in that behavior.
Step 2: Open the puzzle box. This could get tricky. If it’s a brand new puzzle they aren’t easy to open. Explosives work best. If you don’t have any explosives, then I recommend having a responsible adult use a knife or scissors to open it…be very careful. If the puzzle that you have has been opened before, the integrity of the strength of the bottom box may have been compromised, particularly if the puzzle is old. This can result in puzzle pieces going everywhere when you attempt to open the box. You likely will always be missing at least one piece no matter how hard you look or how often you clean. That is, of course, until your pet or small child finds the missing piece and swallows it. Don’t worry, they could probably use more fiber in their diet any way.
Step 3: Sort out the straight edge pieces from the rest. Seriously, I’m not joking here. Everyone knows that this is the proper way to commence puzzle building. Any other way will be shunned. Shunned I tell you.

Step 4: Build the border of the puzzle. Use all of those straight edges that you sorted out. You will likely have to search for more straight edges, they’re elusive little buggers. You’ll probably have to rebuild some of the frame because you thought that you had all of the pieces and you were putting things together that didn’t belong. Try not to tear the nub of the puzzle piece off as your twisting it from its improper mate. Be more careful next time.

Step 5: Separate the remaining puzzle pieces into piles of like patterns and colors, just because it makes my little obsessive-compulsive heart sing. If you have built puzzles in the past by just diving your hand in and picking up a random piece as though it were a bag of potato chips, never find anything that fits together, give up and then go get a real bag of potato chips…this is the reason why puzzle building has been a source of frustration for you. Give the puzzle the respect it deserves and follow the system you animal.
Step 6: Choose a pile and start putting those pieces together. Starting with a pile that matches a section of the border is always a good way to go. Start from the border and work your way in. If you have a subject in the puzzle such as a person or animal it’s also an option to build the face and work your way out (that’s what I did with this puzzle). Continue to do this until you’ve used all of the pieces to copy the photo on the box.
Step 7: Put in the last piece of your puzzle.

Congratulations. Your puzzle is now complete. The world will begin to make sense to you now. Do a celebratory dance.
Yes. Puzzles are awesome.
The End.


%20%23birthday%20%23traditions%20)

)