Blog Archives
")
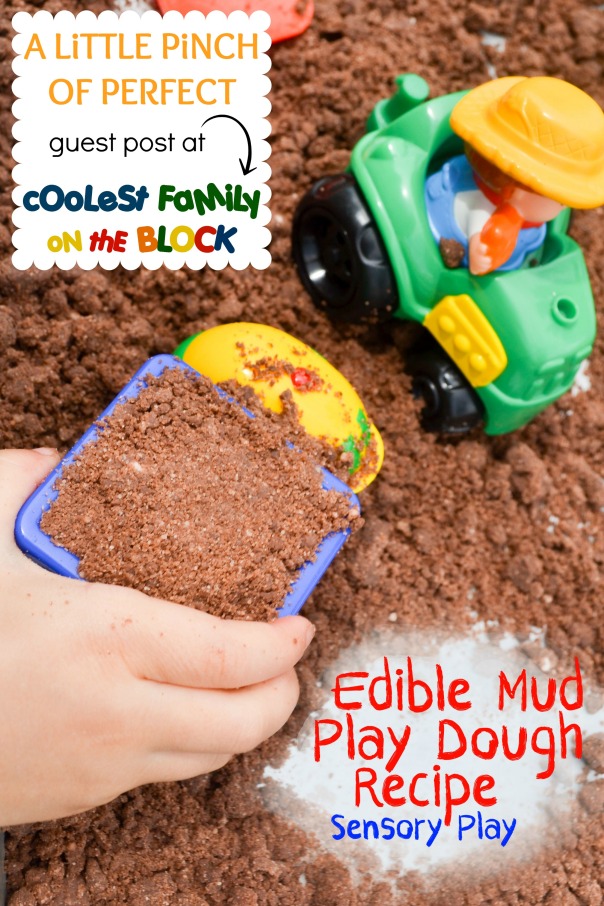
Edible Mud Play Dough (Guest Post: A Pinch of Perfect)
I’m excited to share this guest post with you by Katie from A Pinch of Perfect. Katie posted on my Facebook wall that she found me through the SITS Girls and as soon as I saw her blog I knew I had to ask her to guest post right away. Katie’s blog is packed full of great activities and fun ideas for your little ones, so be sure to visit her blog after reading and commenting on this post! Now here’s Katie…
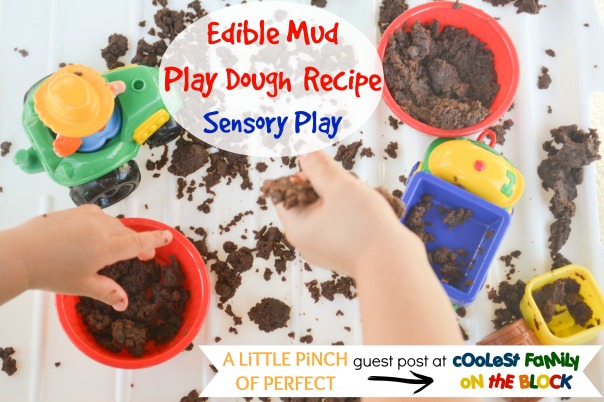
I have noticed that mud must have some sort of magnetic properties because my son can’t seem to stay away from it. My poor garden has suffered multiple assaults from my son and his shovel. To try and deter him from the garden I wanted to make him some mud that he could play with indoors or outdoors and as often as he would like. This is how Edible Mud Play Dough came to be. It had to be edible because I think you never can be too safe when toddlers are around (my son just turned 1.5) so I work really hard at coming up with safe activities for him.
(See more Toddler Friendly Activities Here)
Our homemade mud can be made with things found in your pantry. It’s fast and simple to make and looks exactly like mud. After coming up with this awesome recipe, when my husband came home from work and took a look at the “muddy” tray on the table he wondered why I had brought mud into the house. Oh the look he gave me when I took a bite was priceless, lol! By now he should know we are always up to something fun and interesting.
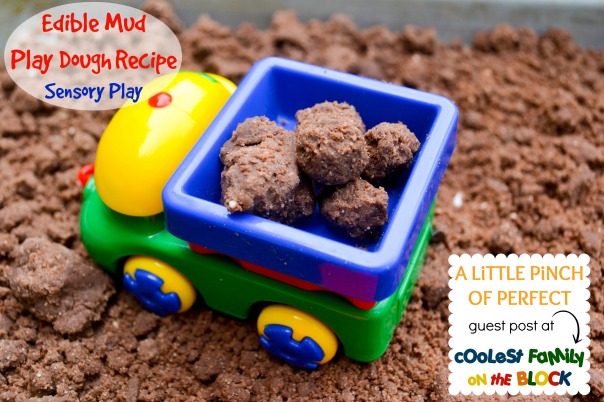
The awesome part about Edible Mud Play Dough is it is dry and crumbly and at the same time doughy and shapeable. Although it is edible, it doesn’t taste good at all so this activity shouldn’t turn into snack time. Get those trucks, shovels, and mud pie pans out because your kiddo is going to love playing with it. What a fun new Sensory Play experience!
(see more Sensory Play Activities Here)
Supplies:
1 Large box of chocolate pudding mix (we used the instant kind)
1 C. baking soda
1/4 C water
3 Tbs. oil
I suggest making one batch per kid.
Directions:
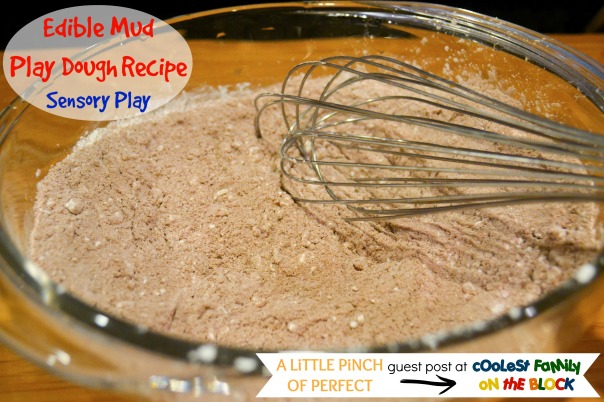
Mix dry ingredients together.
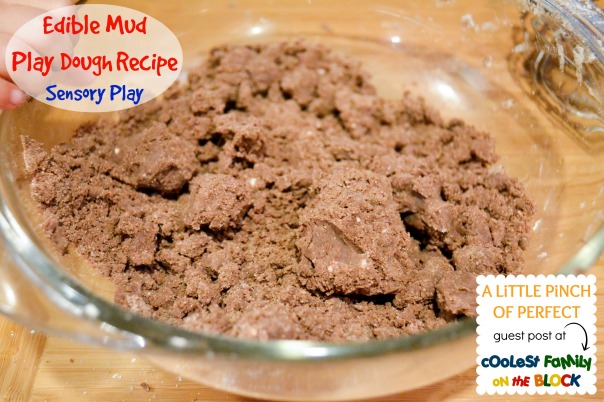
Add wet ingredients and mix evenly and it’s ready to be played with.
Makes a perfect mud ball because it can hold its shape, but will still crumble apart.
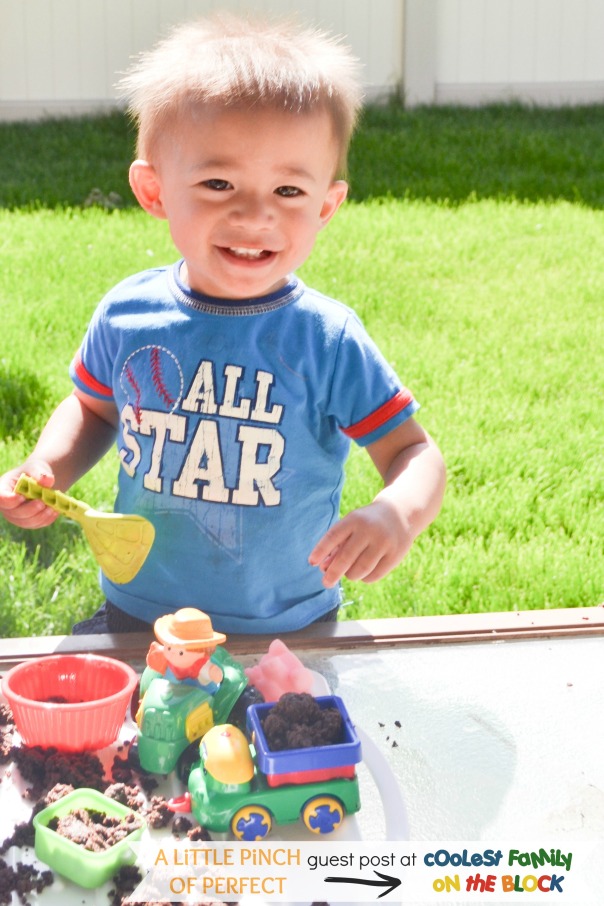
Here are my busy little kiddos smashing, filling, and building away.
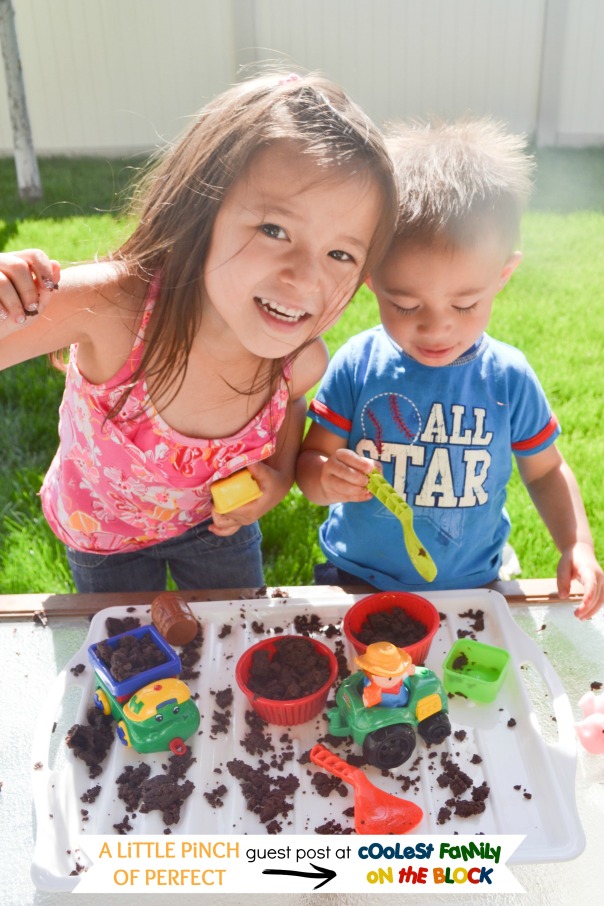
My daughter used the words, “crumbly, brown, and soft.” What sensory words will your kiddo use to describe it?
Sometimes toddlers are hard to keep entertained…well my little man played with his dough for an impressively long time and even outlasted my daughter. He must love his new mud!
We hope you enjoy our Edible Mud Play Dough Recipe. Thanks for playing with us. Drop by A Little Pinch of Perfect to say hi and make sure you catch our next fun idea!
Love-Katie and the Kiddos
![]() Katie is a Stay-At-Home-Mom who is kept busy by her spunky 3 year old daughter and curious 1 year old son. She is always coming up with new, fun, and creative ideas to keep her kiddos excited throughout the day. She believes that creativity helps little minds learn & grow in amazing ways that conventional methods only dream about. Visit A Little Pinch of Perfect to discover more or follow her on social media on Facebook, Pinterest, Twitter, Instagram, Google+, and Bloglovin’
Katie is a Stay-At-Home-Mom who is kept busy by her spunky 3 year old daughter and curious 1 year old son. She is always coming up with new, fun, and creative ideas to keep her kiddos excited throughout the day. She believes that creativity helps little minds learn & grow in amazing ways that conventional methods only dream about. Visit A Little Pinch of Perfect to discover more or follow her on social media on Facebook, Pinterest, Twitter, Instagram, Google+, and Bloglovin’
Thank you, Katie! 🙂
Do your kids love playing in the mud?
Have you ever made mud play dough?
Please leave a comment for Katie below!


This post is linked to: SITS Sharefest (July 12, 2014)
Guest Post: Food as Tradition – Norwegian Butter Cookies
The following guest post is by a fellow Goose, Retha, from Mommy Bee Wisdom.
Growing up every Christmas Eve we went to my Great Grandpa’s house, where all of the family would be gathered. The table there is so large, you can fit around 16 people at it. But there were so many family members, and so much food that no one ever sat at that table. The table would always be covered with food from edge to edge. My dad’s family is Scandinavian, so I believe the word for it is Smorgasbord. We would have a turkey, ham, goose, and some sort of fish as the main meats. The sides would include stuffing, rice pudding with an Almond (the almond is a prosperous sign, and who gets it gets pregnant or married), potato sausage, pickled Herring, lufka (a salt cured fish of sorts), and several cheeses. The desserts would include pies, cookies, and breads. My favorite of all the cookies would be the butter cookie. Our family refers to it as the Norwegian Butter Cookie, but in all actuality the recipe is the same from Russia, to Germany, Poland, etc. These little cookies are a bright yellow, not very big, and so crumbly soft that you can’t just eat one.
This recipe is so very simple, only has 5 ingredients and such a big flavor they are always a hit!
Warning: DO NOT eat the whole batch yourself or you WILL get a tummy ache! Don’t ask me how I know this.
Ingredients:
4 eggs: Hard boiled
2 stick of softened butter (use real butter, margarine will not work right)
1/2 cup of white sugar (Splenda will work here if you need to use that, but add a dash of salt to it to stop the after taste)
2 cups of all purpose flour
1 teaspoon of Almond or Vanilla extract (imitation will work, but the real is best)
Instructions:
1. Start by hard boiling the eggs. Try not to boil them for longer than 2 minutes. As you want a bright yellow yolk, a green yoke means you cooked it too long.

2. Once your eggs are cooled off enough to handle, separate the yoke from the whites, and eat the whites. There’s no point in wasting anything. And preheat your oven to 375 degrees Fahrenheit.
3. Cream (use an electric mixer or food processor) together the butter, sugar and egg yolks.
4. Slowly mix in the flour and extract.
5. Your dough will be quite thick and crumbly (almost the consistency of play dough) This is normal and don’t be tempted to add more liquid.

6. Take a soup spoon and scoop out pieces of dough, roll into a ball and lightly press on to your ungreased cookie sheet. These cookies will not expand, or change shape.

7. Bake for 10-12 minutes or until the edges are a light brown, and the tops look fluffy.
8. Allow to cool, if you can!

I can never wait for the first batch of these to cool, it’s like pulling Christmas out of my oven. And more often then not I am playing hot potato with a cookie. I hope you all enjoy these cookies as much as I do!
Retha Barton blogs at Mommy Bee Wisdom where she teaches other moms that living life from scratch isn’t as hard as it sounds. Retha shows you that you can make it without a lot of money and that sometimes doing things the old way can be more rewarding.


%20%23birthday%20%23traditions%20)

)