Blog Archives
")
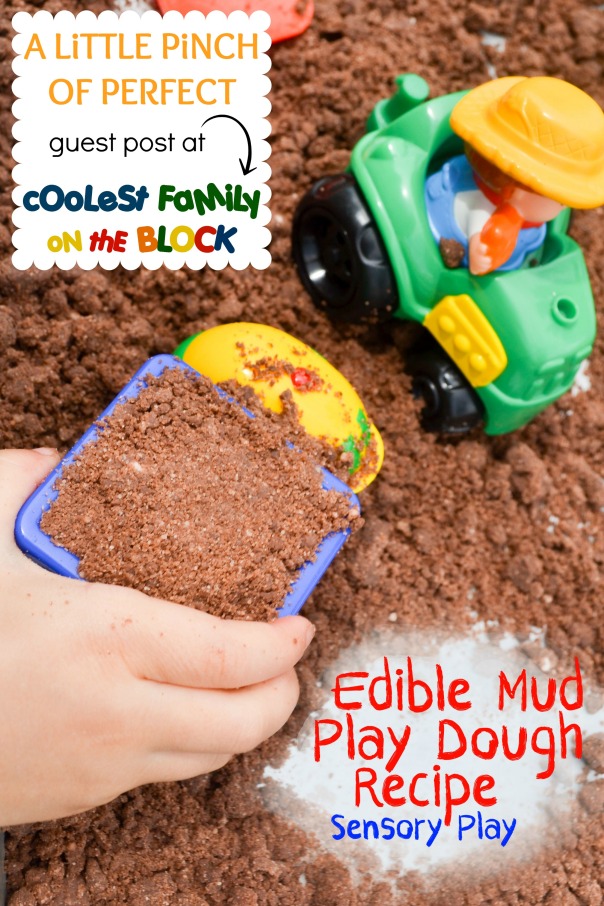
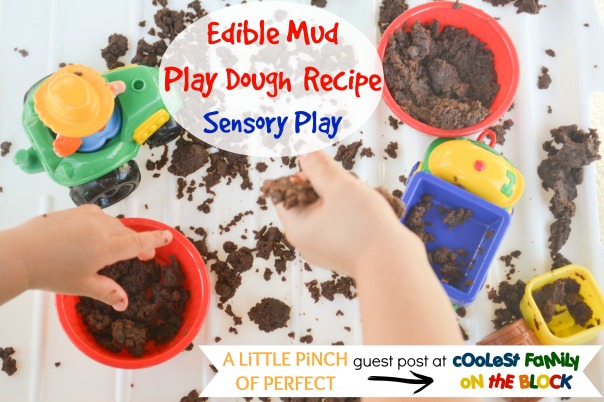
Edible Mud Play Dough (Guest Post: A Pinch of Perfect)
I’m excited to share this guest post with you by Katie from A Pinch of Perfect. Katie posted on my Facebook wall that she found me through the SITS Girls and as soon as I saw her blog I knew I had to ask her to guest post right away. Katie’s blog is packed full of great activities and fun ideas for your little ones, so be sure to visit her blog after reading and commenting on this post! Now here’s Katie…
I have noticed that mud must have some sort of magnetic properties because my son can’t seem to stay away from it. My poor garden has suffered multiple assaults from my son and his shovel. To try and deter him from the garden I wanted to make him some mud that he could play with indoors or outdoors and as often as he would like. This is how Edible Mud Play Dough came to be. It had to be edible because I think you never can be too safe when toddlers are around (my son just turned 1.5) so I work really hard at coming up with safe activities for him.
(See more Toddler Friendly Activities Here)
Our homemade mud can be made with things found in your pantry. It’s fast and simple to make and looks exactly like mud. After coming up with this awesome recipe, when my husband came home from work and took a look at the “muddy” tray on the table he wondered why I had brought mud into the house. Oh the look he gave me when I took a bite was priceless, lol! By now he should know we are always up to something fun and interesting.
The awesome part about Edible Mud Play Dough is it is dry and crumbly and at the same time doughy and shapeable. Although it is edible, it doesn’t taste good at all so this activity shouldn’t turn into snack time. Get those trucks, shovels, and mud pie pans out because your kiddo is going to love playing with it. What a fun new Sensory Play experience!
(see more Sensory Play Activities Here)
Supplies:
1 Large box of chocolate pudding mix (we used the instant kind)
1 C. baking soda
1/4 C water
3 Tbs. oil
I suggest making one batch per kid.
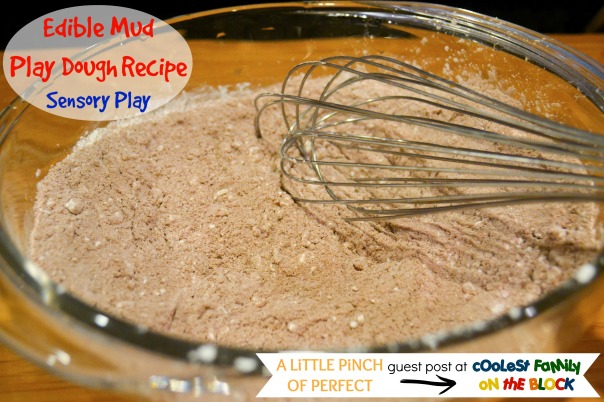
Directions:
Mix dry ingredients together.
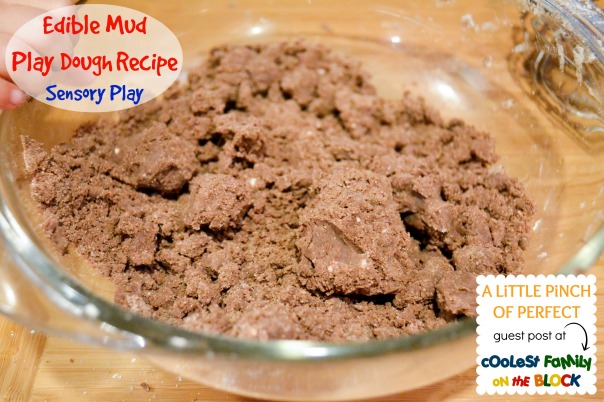
Add wet ingredients and mix evenly and it’s ready to be played with.
Makes a perfect mud ball because it can hold its shape, but will still crumble apart.
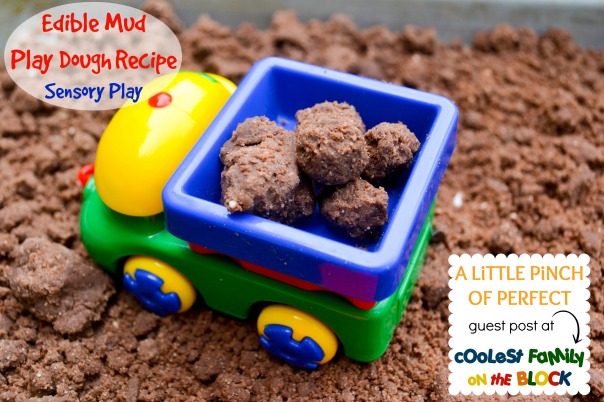
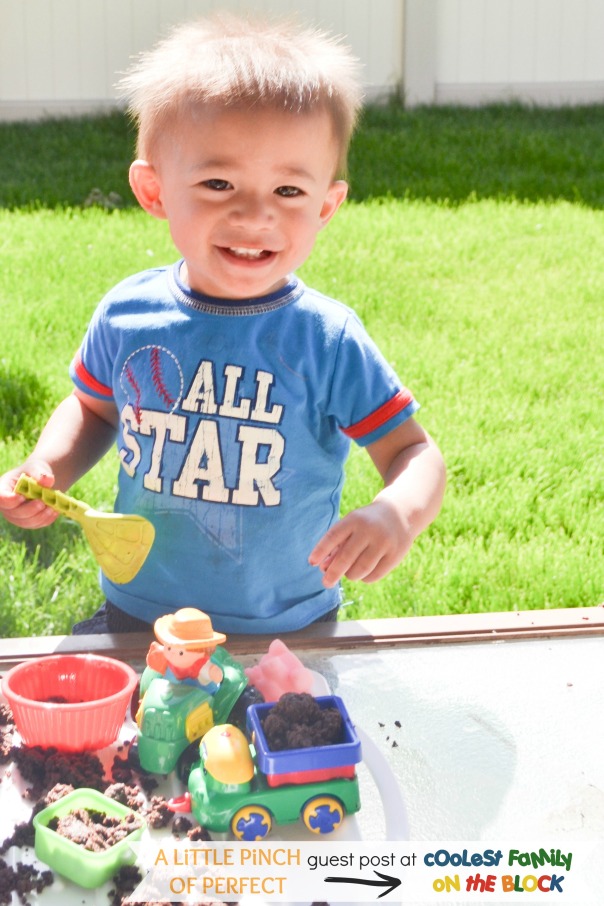
Here are my busy little kiddos smashing, filling, and building away.
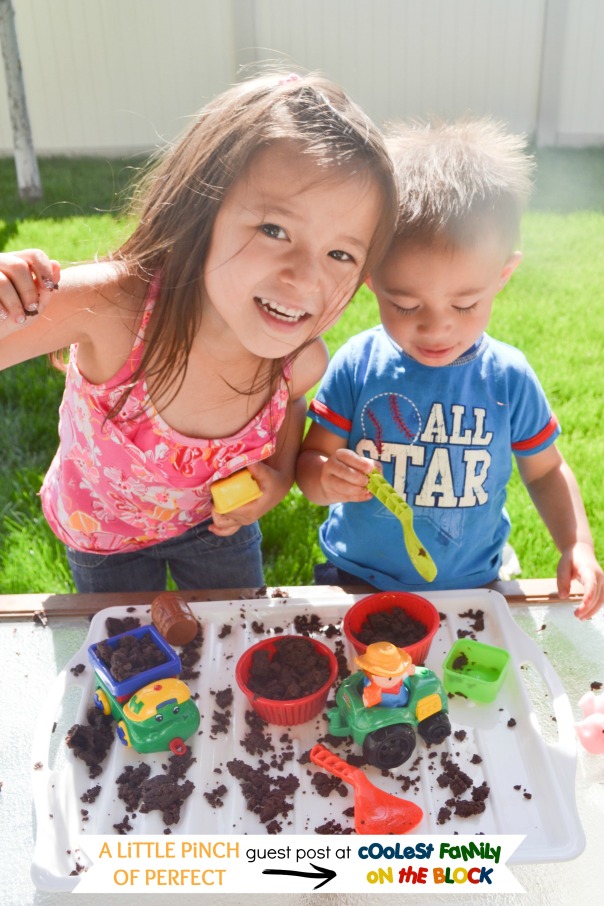
My daughter used the words, “crumbly, brown, and soft.” What sensory words will your kiddo use to describe it?
Sometimes toddlers are hard to keep entertained…well my little man played with his dough for an impressively long time and even outlasted my daughter. He must love his new mud!
We hope you enjoy our Edible Mud Play Dough Recipe. Thanks for playing with us. Drop by A Little Pinch of Perfect to say hi and make sure you catch our next fun idea!
Love-Katie and the Kiddos
![]() Katie is a Stay-At-Home-Mom who is kept busy by her spunky 3 year old daughter and curious 1 year old son. She is always coming up with new, fun, and creative ideas to keep her kiddos excited throughout the day. She believes that creativity helps little minds learn & grow in amazing ways that conventional methods only dream about. Visit A Little Pinch of Perfect to discover more or follow her on social media on Facebook, Pinterest, Twitter, Instagram, Google+, and Bloglovin’
Katie is a Stay-At-Home-Mom who is kept busy by her spunky 3 year old daughter and curious 1 year old son. She is always coming up with new, fun, and creative ideas to keep her kiddos excited throughout the day. She believes that creativity helps little minds learn & grow in amazing ways that conventional methods only dream about. Visit A Little Pinch of Perfect to discover more or follow her on social media on Facebook, Pinterest, Twitter, Instagram, Google+, and Bloglovin’
Thank you, Katie! 🙂
Do your kids love playing in the mud?
Have you ever made mud play dough?
Please leave a comment for Katie below!


This post is linked to: SITS Sharefest (July 12, 2014)
 Traditions")
May Day (May 1st) Traditions


May 1st is “May Day”! On May Day there is a tradition of leaving baskets of flowers or goodies hanging on your neighbors’ doors anonymously. Other ways to celebrate May Day include the Maypole, building fairy houses, making/wearing a floral hat or wreath, and even a Magic Jellybean Lollipop Garden (a tradition that my family does for Easter). Below you will find a round up of May Day ideas from around the web including traditions, maypole tutorials, May Day treats, and free May Day printables.
You can find inspiration and tutorials for May Baskets on my May Day pinboard. A May Day Basket post will be coming someday. Maybe tomorrow, maybe next year. Who knows?! (I sure don’t.)

MAY DAY TRADITIONS
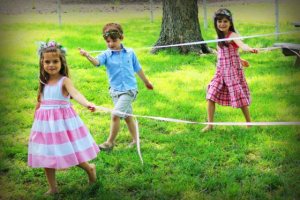
*6 Ways to Celebrate May Day: @ WikiHow
Adding a Maypole to Your Backyard, Warming Up By a Bonfire, Trying Other Dancing, Enjoying May Day Food and Drink, Celebrating May Day with Flowers, Trying a Little May Magic
*The Most Fun May Day Traditions: Magic Morning Dew, Fairy Houses and Foliage Accessories: @ BunchFamily.ca
*Jack in the green: @ Wikipedia.org

*Creating Summer Hats: @ Creative Connections for Kids

*May Day Flower Headband Tutorial: @ Simple Simon and Co.

*May Day – Magic Jelly Beans: @ Nothing But Country

*Super Mommy Secret~May Day Tradition: @ Secrets of a Super Mommy
*An Old-Fashioned May Day Celebration: @ Mrs. Gore’s Diary
*Montessori Inspired May Day Activities: @ Living Montessori Now
A great collection of links to May Day Activities

*LOCAL SPRING FESTIVALS!
Check your local community to see if they are hosting a spring or May Day festival!
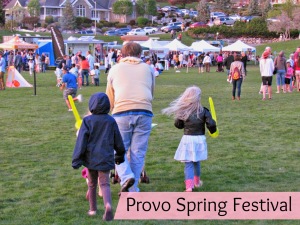
Adelina from @ Home Maid Simple shared her family’s trip to the Provo Spring Festival complete with Maypole dancing!
*Carrying on the May Day Tradition: @ Omahaha

MAYPOLES
*Paper Towel Roll Maypole Craft: @ DLTK-Kids

*Children’s Maypole Tutorial: @ Mommy Blessings
![02 Spring 1609_thumb[1]](https://coolestfamilyontheblock.com/wp-content/uploads/2014/04/02-spring-1609_thumb1.jpg?w=203&h=300)
*Making a Maypole: @ MarthaStewart.com

*Maypole Dancing and DIY Maypole: @ How to Run a Home Daycare

*May Day and DIY Maypole: @ Montessori Mischief
They used a tall floor lamp as a maypole!


MAY DAY TREATS AND SNACKS
*DIY Mini Maypole Cakes: @ Studio DIY
Cute Maypole bundt cake made with a stripey straw and ribbons.

*May Day Cupcakes: @ Cupcake Project

*Maypole cupcakes: @ Martha Stewart

*Maypole Cake: @ Fiskars


MAY DAY PRINTABLES
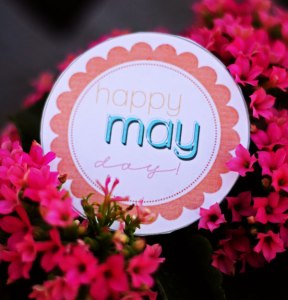
*Start a May Day Tradition with these Free May Day Printables: @ Happy Money Saver
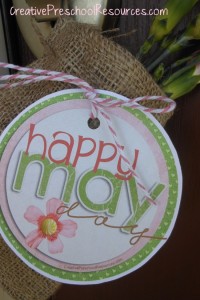
*May Day Surprise: @ Creative Preschool Resources
Free printable tag
*Free Printable May Day Gift Tags: @ Skip to My Lou

*DIY Printable May Day Basket: @ Alpha Mom

*Printable May Day Basket Template: @ Printables4Kids.com

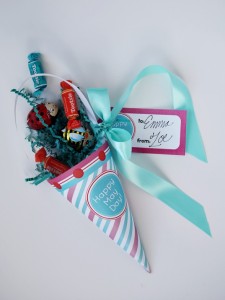
*Free Printable May Day Basket (cone): @ The Neighborhood
*May Baskets Poem and Poster / Coloring Sheet: @ DLTK

Do you celebrate May Day? What’s your May Day tradition? Let me know in the comments!

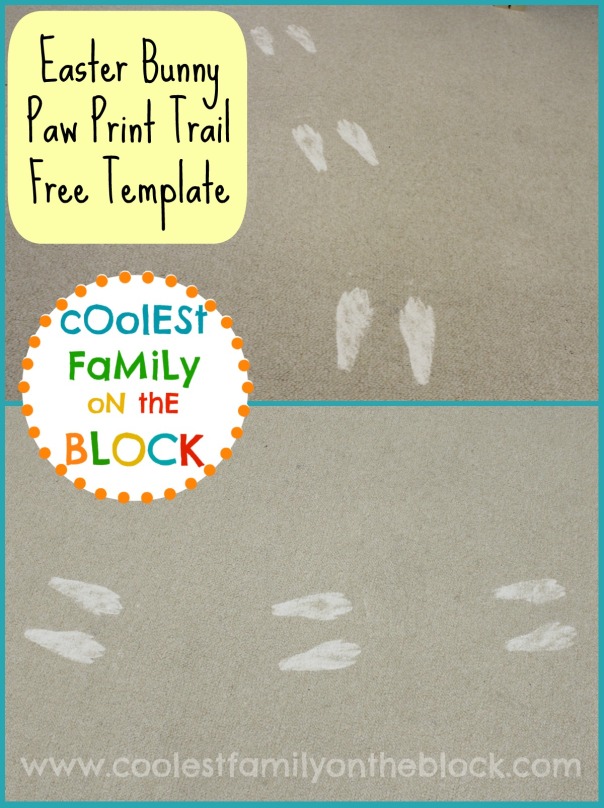
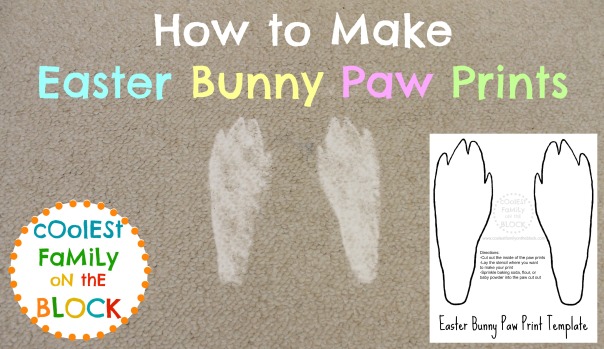
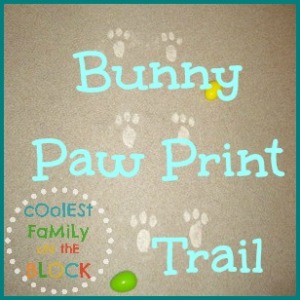
How to Make Easter Bunny Paw Prints with Free Printable Template
Learn how to make DIY Easter Bunny paw prints with a free printable template and video tutorial!


To create your own Easter Bunny paw print trail you’ll need to print out a template online or create your own template. Pick a white powder (baking soda, flour, baby powder) to sprinkle inside the bunny paw print stencil.
Watch the quick video tutorial below to learn how to make DIY Easter Bunny tracks using my free printable Easter Bunny paw print template!
(Watch video here)
For the past few years I’ve used other free printable templates to create a more whimsical looking Easter bunny footprint. This year I decided to create my own template and I wanted to try to make it look like a more realistic rabbit paw print. I’ve never seen rabbit tracks in real life (I’m not very outdoorsy) but after looking over some photos online, I think I came up with a decent version.

I also created a version that includes front paws. In my opinion, the Easter bunny only hops on his back paws because he’s carrying the Easter baskets, but the front paws are included if you want them. There are three files below. You can print out the version with just the back paws, the version with front and back paws, or the last file which contains both of the other templates in one file. Click on the photos or links to download, or right click and “save link as” to save the pdf to your computer.
Easter Bunny Paw Print Templates are for personal non-commercial use only.
Attention pinners and bloggers:
When sharing please link to the original post, do not link directly to the pdf file url. Thank you.
Free Printable Easter Bunny Paw Print Template: Both versions in one document


Free Printable Easter Bunny Paw Print Template: Back Paws Only
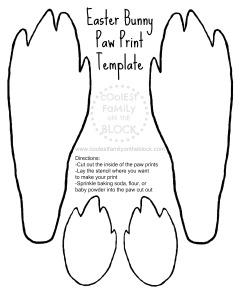

Free Printable Easter Bunny Paw Print Template: Front and Back Paws
Print the template out on card stock as regular paper tends to be too flimsy to use as a stencil. Although I didn’t show this trick in the video, you can use a damp cloth to wet around the edges of the stencil to catch the powder that might otherwise creep outside of the template. Or you could use the damp cloth to dip in the powder first and then dab around the inside of the stencil rather than sprinkling. I’ve never needed to use either of these methods and always just sprinkled the powder the way I demonstrated in the video.


![]()
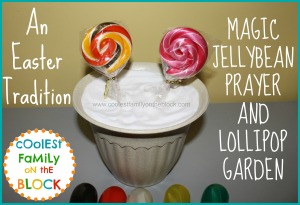
*EASTER TRADITION: MAGIC JELLYBEAN PRAYER and LOLLIPOP GARDEN
*EASTER TRADITION: EASTER BUNNY TRACKS 2011
*EASTER TRADITION: EASTER BUNNY TRACKS 2012

*EASTER TRADITION: EASTER BUNNY TRACKS 2013

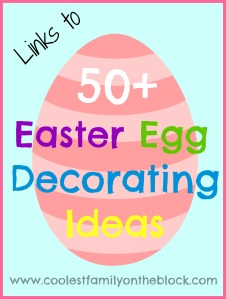
*50+ EASTER EGG DECORATING IDEAS
*NATURAL DYES FOR COLORING EASTER EGGS

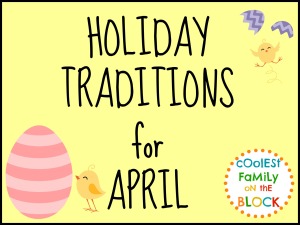
*APRIL HOLIDAY TRADITIONS
This post is linked to…
SITS Sharefest / Mama Kat’s Writer’s Workshop / Mama Kat’s Vlog Prompts
")
Easter Traditions: Bunny Footprints (2011)


Find a free printable Easter Bunny paw print template/stencil here! Front and back paws! 🙂
Last year on Easter we woke up to find that the Easter Bunny had left bunny tracks in the family room!

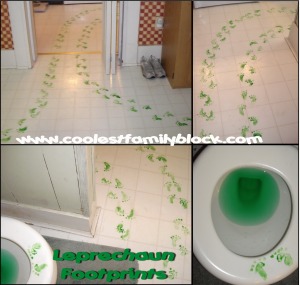
At first Adaline was a little afraid of the bunny footprints which is odd considering that she didn’t seem to mind the leprechaun footprints at all.

It looks as though the Bunny hopped in through the window and then hopped across the room to fill Adaline’s Easter basket leaving a trail of bunny prints behind.

He also dropped some plastic eggs that had candy in them. Adaline enjoyed putting them in her basket once her fear of the bunny paw prints mellowed.

Adaline’s bunny and book about Easter was waiting for her.

Adaline’s Easter basket


Don’t worry about the bunny prints…they vacuumed right up! In fact, I’d say they were as easy to vacuum as flour, baking soda, or baby powder ;)!
If you need a template you can try this one!
Does the Easter Bunny leave paw prints at your house? Let me know in the comments!
*FREE PRINTABLE EASTER BUNNY PAW PRINT TEMPLATE

*EASTER TRADITION: EASTER BUNNY TRACKS 2012
*EASTER TRADITION: EASTER BUNNY TRACKS 2013
*Natural Dyes for Easter Eggs (Links)
*Round up of 50+ Easter Egg Decorating Ideas
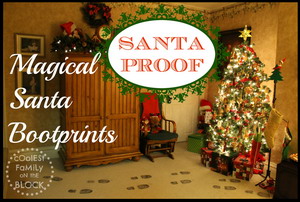
*Santa’s Magic Sooty Bootprints!
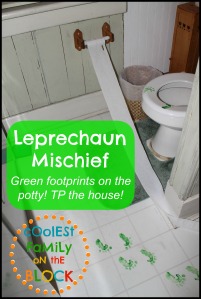
*Leprechaun Visit 2011: Leprechaun footprints and green toilet water!
*Leprechaun Visit 2013: Little green footprints!
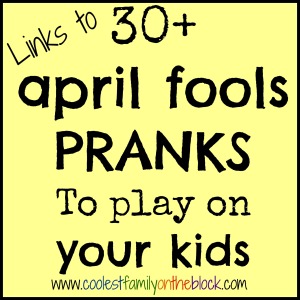
*30+ April Fools Pranks You Can Play on Your Kids!
This post is linked to…


")
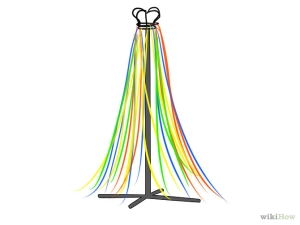
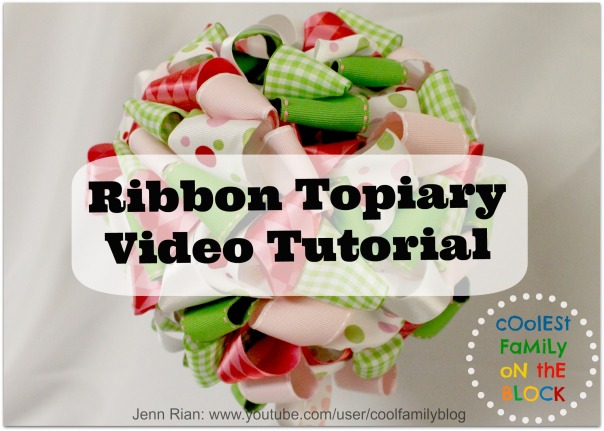
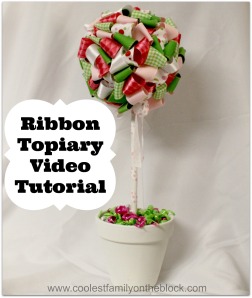
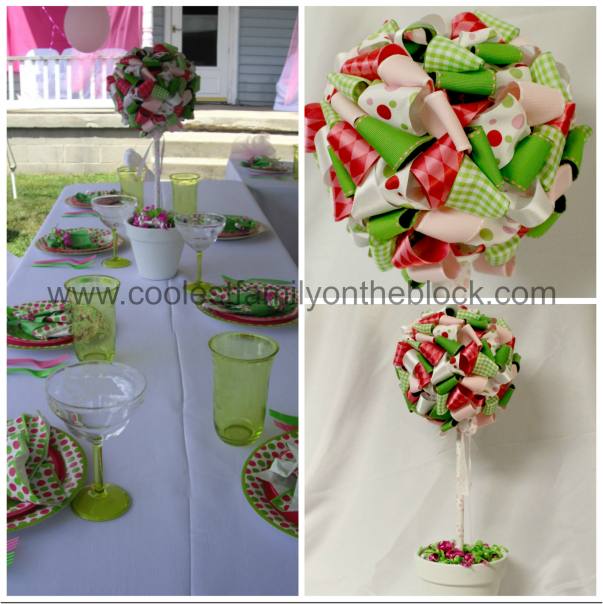
Ribbon Topiary Video Tutorial (Centerpiece)


)
For Adaline’s 1st Birthday Party in 2010 I made ribbon topiaries as the centerpieces. I originally saw the idea and tutorial on the Polka Dot Birthday blog. I bought all of the supplies for the topiaries at The Hobby Lobby and got the ribbon at 50% off.
While making the ribbon balls for the topiaries last year I made a video “tutorial” (if you can call it that) of how to put the ribbon ball together. The video is really unprofessional since I did it by myself on a whim while Adaline was napping. I didn’t even have any free hands to make the ribbon ball while holding the camera!

Supplies to make a ribbon ball:
-Styrofoam ball
-Ribbon
-Straight pins
Supplies to make a topiary:
-Completed ribbon ball or floral ball
-Wooden dowel rod
-Flower pot, bucket, basket, box, etc.
-Floral foam (to hold the dowel in place)
-Curling ribbon, Easter grass, moss, shredded paper, etc. (to cover the floral foam)
Video Tutorial for Ribbon Ball:
(Click to view on YouTube)
(Note: I edited the video on 10/31/13. To watch the excruciatingly long unedited version Click to view on YouTube.)
Instructions:
1. Cut the ribbon into 4.5″ strips

2. Loop the ribbons


Secure with two straight pins. I angled the pins.


3. Cover the entire ball with strips of ribbon. Fill in as necessary.
4. Put the floral foam into your pot or topiary base of your choice
(If the pot needs painted…paint it first!)
5. Paint or cover your dowel rod
6. Poke the dowel rod into the floral foam and also into the completed ribbon ball
7. Cover the floral foam with curling ribbon, etc.
)
Below are the details for what I used to make the 3 ribbon balls.

Details:
-I used 6 inch foam balls
-I used 16 yards ribbon per ball cut into 4.5” strips (48 yards total for 3)
-I used 20-22 strips per color and used 6 different colors,
120-132 strips per ball (360-396 total for 3)
-I used 2 straight pins per ribbon, a total of 250 pins
-The topiaries cost me $20 a piece to make
-The ribbon balls took about 2 hours each to complete
)
This post is linked to:
Tip Junkie /Design Dazzle / Patches of Pink / The Frugal Girls: Chic and Crafty
DIY No Sew Party Hat Tutorial / Tissue Number Birthday Sign (Mini-Tutorial)


Ladybug Picnic: 2nd Birthday / Pink and Green Polka Dots and Cupcakes Party: 1st Birthday / Ham and Man Party: 30th Birthday / Celebrating 30 years in 30 days! All of my birthdays from 1980-2009 / Birthday Girl…2 years old


Birthday Traditions: Personalized Birthday CD / Birthday Traditions: Knife and Cake Server / Birthday Traditions: Professional Photos / Birthday Traditions: Photo Puzzle / Happy 2nd Birthday, Adaline!


%20%23birthday%20%23traditions%20)