Blog Archives
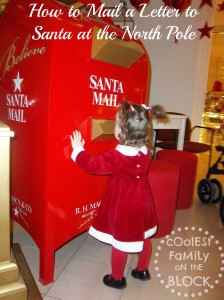
How to Mail a Letter to Santa at the North Pole
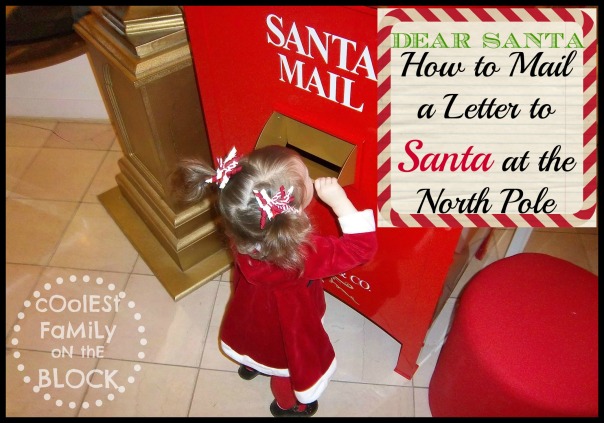

Mailing a letter to the North Pole is a beloved Christmas tradition. If you’re looking for a way to make your child’s letter to Santa a special experience, you’ve come to the right place. Now that your child has finished writing their letter to Santa you need to get it to the North Pole. There are many different ways to get a “Dear Santa” letter to the North Pole; you just need to find the one that works best for your family. You know how much available time you have, your budget, and most importantly you know what your children will enjoy.
Before choosing how to get your letter to the North Pole you need to decide if you’d like to have your child’s letter as a keepsake. If you do, keep in mind that letters sent to Santa through mail or North Pole Wind are unable to be returned, however, letters sent to Santa through magic are able to be collected by the elves and returned to you for safe keeping.
Sending your letter to Santa by Magic
*If you send a letter to Santa through magic you can request that it be collected by an elf once Santa is done with it and returned to you for safe keeping. You can then save these treasures in a special book to give to your child when they are older.
Elf Express Delivery: If you have an Elf on the Shelf or an Elf Magic Elf, or a personal family North Pole Elf, they would be happy to deliver your letter to Santa. Some elves prefer that you first put your letter into a small magical mailbox in your home. They will later retrieve the letter and deliver it to Santa personally.

Santa or Elf Pick-Up: You can leave your letter to Santa somewhere in your house for Santa or one of his elves to pick up during the night. Some more popular places are by the fireplace, under a pillow, or in your shoe. If Santa comes to visit you on the Eve of St. Nicholas Day (December 6), you could leave your letter for him that night.
Sending your letter to Santa by North Pole Wind
*If you send a letter to Santa through North Pole Wind
you be unable to retrieve a copy as a keepsake.
Chimney Delivery: In Britain some children burn their letters to Santa on the fire and the ashes and smoke travel up the chimney and are magically transported to the North Pole by the wind. This isn’t as common today since there are fewer working fireplaces and it poses safety and environmental hazards.
Balloon Delivery: In Mexico and other Latin American countries, children tie their letters to a helium balloon and release them in the air where it will magically travel to the North Pole. This method may not appeal to those more environmentally cautious.
Sending your letter to Santa by Mail
*If you send a letter to Santa through mail
you will be unable to retrieve a copy as a keepsake.
Believe 2010- Santa’s Post Office at Macy’s:
“At every Macy’s across the country there is a mailbox to collect letters for Santa Claus. Bring your stamped letter to Macy’s, addressed to Santa at the North Pole, and drop it into Santa’s special mailbox. We will count them up, and for each letter received, we’ll donate $1 to the Make-A-Wish Foundation, up to $1,000,000. We’ll deliver them to the Post Office, and together, we’ll collect a Million Reasons to Believe.”
Use Macy’s Mailbox locater to find a store near you.
Their website has free printable stationary that you can use for your letter to Santa. You can also create your letter on their website and “draw” on the letter and add “stickers” before you print it out…what fun! There’s also a free Activity Guide and School Toolkit.
North Pole Address
*You can mail your letter to Santa through the post office at the following addresses. Many post offices have special Santa letter drop off boxes located on site. Letters going to the North Pole through the Post Office should be mailed no later than December 08 in order to receive a reply from Santa in time.
I’ve found several different addresses online for North Pole, AK but I’m not certain which is the most current. I’ve included them all below. You should contact your local post office with any questions. The most current information from the USPS is found here (from 2018).
NORTH POLE POSTMARK
POSTMASTER
4141 POSTMARK DR
ANCHORAGE AK 99530-9998
U.S.
Santa Claus
Santa Claus Village
North Pole, Alaska 99705
North Pole Christmas Cancellation
Postmaster
4141 Postmark Drive
Anchorage, AK 99530-99998
North Pole Christmas Cancellation
Postmaster
5400 Mail Trail
Fairbanks, AK 99709-9998
North Polar – Santa Claus
P.O. Box 56099
North Pole, Alaska 99705-1099
***ADMIN NOTE: ^ I was informed via email on 12/20/2018 that the above P.O. box is closed. Please refrain from using this address in the future. Thank you.***
Canada
Santa Claus
The North Pole
H0H 0H0
UK
Santa
Reindeerland
SAN TA1
Finland
Santa Claus
Santa Claus Village
FIN-96930
Arctic Circle, Finland
*Christmas Postmarks:
This is a great list of North Pole and Christmas related postmarks and zip codes!
Preserving the Memory
Don’t forget to take photos of your kids as they’re writing their letters. Other important snapshots to take are holding up the finished letter, and putting the letter into the mailbox. If you will be sending your letter by mail, through Macy’s, or via North Pole Wind, you will be unable to retrieve your letter and will need to make a copy.
Keep a Copy
You can take a photo of the letter, scan a copy of it, or make a photo copy of it to have as a keepsake for scrapbooking. You can hand write or type a copy of the letter, however, you won’t have your child’s handwriting or any drawings they’ve included. For this reason I recommend also taking a photo of the letter or scanning it.
Send a Copy to the Newspaper
Consider sending a copy to the newspaper or local records and landmarks department. Be sure to save a copy of the clipping if your child’s letter gets published.

Special North Pole Postmarks and Stamps

Photo Credit: NorthPolePostmark.blogspot.com
*If you send a letter to Santa through the mail you might receive a letter back from Santa with a North Pole Postmark! Letters going to the North Pole through the Post Office should be mailed no later than December 15 in order to receive a reply from Santa in time. Of course, sending a letter through magic is a more certain way of receiving a response from St. Nick since there aren’t as many time delays.
Below are some places online where you can purchase the special North Pole Postmark that letters from Santa bear and stamps that Santa uses when replying to children. Please be advised that I have not personally purchased or used any of the products below and therefore cannot comment on the quality of the product or reliability of the company. Also, any prices listed are obviously subject to change at anytime causing the amount written here to be different. As always please use caution when purchasing products online.
*Christmas Postage Stamps – Price Vary : Lovely Christmas postage stamps at ChristmasPostageStamps.net
*NorthPolePostmark.blogspot.com – Free!: Free North Pole Postmark! Go here to right click and save the postmark image shown at the top of this post. This can be printed onto an envelope.
*SantaLetter4You.com – Free!: Free North Pole Postmark and Stamp…choose from two! Go here to print the postmark image onto an envelope.
*Personalized Santa Letters – Free!: Go here for free North Pole Postmark clipart and free printable letters from Santa.
*North Pole Rubber Stamps – Prices Vary (etsy.com): Search results on Etsy.com for ”north pole rubber stamp”

How does your family get Santa’s letter to the North Pole? Share in the comments!
This post is linked to:

![]()


Dear Santa: Writing a letter to Santa
%20%23santa%20%23traditions%20%23christmas)
Writing a letter to Santa is a beloved Christmas tradition. If you’re looking for a way to make your child’s letter to Santa a special experience, you’ve come to the right place. Remember to choose what works for your family. You know how much available time you have, your budget, and most importantly you know what your children will enjoy.
1. Picking a date
Choose a date to have your children write their letters to Santa. Some of the more popular choices are Thanksgiving Day, Thanksgiving weekend, December 1, or December 5 (The day before St. Nicholas Day).
Determine if you want to tell the kids ahead of time so they can anticipate writing their letter to Santa or if you would rather surprise them one day with, “Guess what, kids, it’s time to write letters to Santa right now!”
2. Getting in the Christmas Spirit
Everything is more fun when it’s more festive! To set the Christmas mood play Christmas music, wear Santa hats or Christmas themed clothing/pajamas, drink hot cocoa or apple cider, and eat Christmas cookies. When you’re finished with the letters, watch a Christmas movie or read a book (bonus points if the story is about writing a letter to Santa!).
3. Gathering all the necessary materials
For a simple letter you’ll need the basics: paper, writing utensils, envelopes, and stamps (optional). If you’d like to kick it up a notch consider the following ideas.
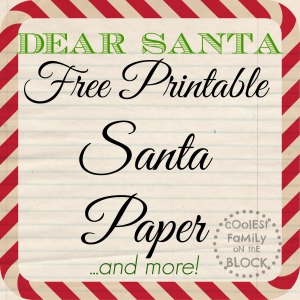
*Paper: Have the kids write their letters on special Santa or Christmas themed paper or have them make a card. (Click here for links to free printable “Letter to Santa” paper.)
*Writing Utensils: Crayons and markers are the popular choice, but you could also use glitter or gel pens if that’s something your child would enjoy (although some of these are difficult to read). A simple yet festive alternative to the every day writing utensil is to use Christmas-themed pens/pencils with Christmas toppers. For craft-loving kids have them decorate their writing utensils with glitter, stickers, poms, tinsel, etc. (Don’t let them go too overboard and be sure they don’t gunk up the tip…they still need to write with it!). Consider having a special official “Letter to Santa” pen to use every year. This could be purchased or made. Be careful with some of the cheap themed Christmas pens as the ink doesn’t seem to last from year to year 😦 . Please remember to always use age-appropriate writing utensils and supervise younger children.
*Envelopes: If the kids will be making their own cards, make sure you have an envelope big enough to fit it or have them keep their card letter-sized and foldable. Add stickers or drawings to the envelope but stay away from glitter and such as the letter will be handled by postal workers. Consider putting a Christmas themed stamp on your letter to Santa. This is optional as we all know that Santa will always receive our letter even if there’s no stamp! If you have photo-stamps of the kids that would make it particularly special (bonus points if that photo is from a previous Christmas!). Tomorrow I’ll be writing about mailing your letter to Santa, so be sure to check back for more ideas.
4. Writing the letter to Santa
For many children the focus of the letter is their Christmas Wish List, but many parents are encouraging their children to be more personal (and less greedy) with the jolly old elf.
Below are some ideas of what they can write about.
*Start off by greeting Santa.
*Ask Santa how he is doing
*Ask about other favorite North Pole residents such as Mrs. Claus, Rudolph and the other Reindeer, Buddy the Elf, Frosty the Snowman, Jack Frost, or Suzy Snowflake.
*Thank Santa for the presents he brought last year
*Tell Santa about the year you had, something fun that happened, or any new milestones like getting/losing a tooth, starting school, or welcoming a new sibling to the family.
*Tell Santa about your favorite things such as your favorite color, food, Christmas cookie, book, movie, hobby, or subject in school.
*Tell Santa about your behavior. Be honest and give him examples of the good or bad things that you did and why you deserve to be on the nice (or naughty) list.
*Tell Santa what you want for Christmas.
Give your child a number of things to ask for such as “no more than 3” and explain that Santa doesn’t always give us everything that we ask for.
*Tell Santa what you would like someone else to have for Christmas. “I think you should bring my sister a doll because she was very good and shared with me this year. It would be really nice if you could bring my neighbor a new winter coat.”
*Tell Santa about Jesus’ birthday and how you will celebrate it.
*Leave a question for Santa in the P.S.
*Sign your name, age, and city, state
Tips for non-writing children
If your children are too young to write, you’ll have to write the letter for them while they tell you what to say. There are ways to keep your non-writing children involved in the letter writing.
*Have the children sign their name by holding onto their hand while you form the letters.
*Have the kids draw a picture (This is a good idea whether they can write or not! Santa loves drawings!)
*Include a hand print, finger print, or hand tracing. If you already do this as part of another Christmas tradition…just make another one for Santa!
Make a Hand print Santa
5. Preserving the Memory!
Don’t forget to take photos of your kids as they’re writing their letters. Other important snapshots to take are holding up the finished letter, and putting the letter into the mailbox. If you can record some video footage consider “interviewing” your child asking them what they’re telling Santa. You can use this same technique once the letter-writing experience is over to have the kids either tell you on tape or write down what they thought about it. Give them some prompts such as what was your favorite part about writing to Santa? You may get answers like “I liked drawing Santa a picture or it was really fun to put the letter in the big mailbox.” This will give you an idea of what the child enjoyed, what to make tradition, and what to skip (Did you try decorating the pencils and your child didn’t mention anything about it? Then you could probably skip it the next year and it won’t be missed.) Remember to write your child’s age and the year somewhere on the letter. Adding things such as the hand prints or drawings mentioned above are an added keepsake if you’ll be keeping the letter rather than sending it away.
6. Teaching/Learning Opportunities
Some parents take this opportunity to teach their children proper letter writing etiquette. When Christmas is over, have the kids write Santa a thank you note. For children still learning to write you can take this opportunity to help them practice their handwriting.
For those of you interested in having your child write a formal “business” letter to Santa Claus check out this website Write a Letter to Santa Claus or do an internet search for more information.
A Package from Santa
So you’ve read all of these ideas and you’re still thinking, “This still doesn’t have the magic that I’m looking for. How do I really make this experience special for my child?” Alrighty then, you asked for it…
If you really want to do something unforgettable for your kids you should probably contact Santa and let him know that you want this year to be very special. He just might surprise you by dropping off a package for your kids with special materials in there just for writing him a letter. Of course, just like you, Santa knows your kids and your family very well so he’ll be certain to include just the right stuff. Maybe Santa knows that just sending some stationary, envelopes, and stamps would be perfect for your family. Or maybe he knows that you’d like something a little more involved.
For the craft-loving child he may include the supplies for a hand-made letter to Santa and perhaps even some things for decorating their writing utensil. Santa knows if your kids like to bake with you in the kitchen, so he might just send you a new recipe and ingredients for a cookie that he’d like you to leave for him on Christmas Eve. He might just help you capture that Christmas spirit by sending along a Christmas cd, book, or movie, some cocoa, or your very own Santa or Elf hats. Santa knows that most kids love to color so I wouldn’t be surprised if he included some coloring sheets. Of course, Santa will be sure to send you the envelopes and stamps needed to get your letters back to the North Pole. And you never know, he just might send your kids very special “Letter to Santa” pens only to be used while writing letters to the North Pole.
Santa is really very clever with how he delivers these packages. Sometimes he sends them through the mail, sometimes he leaves them on the porch, sometimes he leave them by the chimney, sometimes he leaves them at the foot of the bed either while the kids are sleeping or while they’re at school, sometimes he’ll have an Elf on the Shelf or an Elf Magic Elf deliver them. One thing’s for sure…no one ever sees him do it, but sometimes you might just hear his sleigh bells.
Does your family have any traditions for writing letters to Santa? Please share in the comment section below!
![]()
My letter to Santa 1984
*Writing a letter to Santa to mail or email can be a memorable family tradition using my tips and ideas for making the experience special. The “Dear Santa” series will tell you everything you need to know about writing to Santa. Please subscribe to receive email updates.*

In 1984 I wrote a letter to Santa when Cabbage Patch dolls were the must-have toy of the year. While looking through some of my memorabilia I found a typed story that my paternal grandmother had written about my letter to Santa that year. Here is the story in my grandmother’s words:
THE BIRTH OF MY PREEMIE
I am a grandmother with three grown children and three grandchildren. I am also a serious Precious Moments collector. And although my kids think Mom has gone bananas, I have over one hundred Precious Moments to help me relive those very special precious moments that are but a memory when our children grow and leave home. To add more fuel to the fire of their minds that told them Mom is stepping off the deep end, I announced to everyone that I wanted to adopt my own Preemie: Not one that belonged to my granddaughters, but one of my very own.
As an avid Precious Moments collector, I have become accustomed to looking for those hard to find-just have to have figurines. And so…my search began. Sear’s, Penny’s, and Montgomery Wards were all among my list of places to call in my unrelenting search for my very own Preemie; but my pleas fell on deaf ears. They wouldn’t even take my order! I followed every lead, every hint of a lead, only to be disappointed time and time again.
Disappointed, but not yet defeated, I continued my search. My desire to adopt my very own Preemie prompted me to call my two daughters, who live in Florida, to have them place orders there. They did so, but again, no promises. No closer to my goal, the summer ended.
The holidays were upon us. In November our local newspaper was printing letters from children to Santa Claus. My two granddaughters, Jenny, five, and Jessie, four, insisted that I help them write their letter to Santa. Now, the newspaper, having been flooded with letters from anxious children said they had all the letters they could print for the remaining days until Christmas. I explained this to the girls, but they, like their grandma, were persistent. I, being a grandma who loves and spoils her grandchildren, gave in. I sat with pen and paper in hand and they began telling me what to write, …”We would like Cabbage Patch dolls, and please bring Grandma a Preemie too”. There, it was done! The girls, however, wanted to go one step further, “Mail it in Grandma. Please!” were now the words I was hearing. Even though I was sure that the letter would not get into the paper, how could I resist those four, big, beautiful, pleading eyes looking up at me? Well, I couldn’t (a weakness I’m sure all grandmas are familiar with); to make them happy, I mailed it in.
Good news for grandmas all over the world. Somehow it worked! One week later as I was reading the newspaper, there among all of the letters to Santa, in bold type, the caption, BRING GRANDMA A PREEMIE TOO, caught my eye. They printed it! I immediately called the girls to tell them the good news. They came over and needless to say, they were very excited, and quite impressed to see their names in the paper. Of course, I was excited for them, and naturally, I received many comments from friends who also read the letter. Maybe I should have written my own letter to Santa? Oh, well…

Christmas was almost here and even though my search for my Preemie had still not seen it’s end, my oldest granddaughter, Jenny, kept telling me not to worry because she prayed and knew that I was going to get my Preemie. The faith of a child! It worked with their letter and considering I was getting no where fast with all my efforts, maybe…
Christmas came and with it, courtesy of my youngest daughter in Florida, came two Cabbage Patch dolls for my two very special granddaughters! Me? Well, thanks to my oldest daughter, on December 25, 1984, my beautiful (?), little Preemie, Jenny Lynn was born, and I couldn’t be happier. Of course, I still love my Precious Moments.


The adoption papers for my Cabbage Patch Kid

Dear Santa Series:
*Dear Santa: Part 1 Writing a Letter to Santa
*Dear Santa: Part 2 Mailing a Letter to Santa
*Dear Santa: Part 3 Paper for Writing to Santa: Free printables and more!
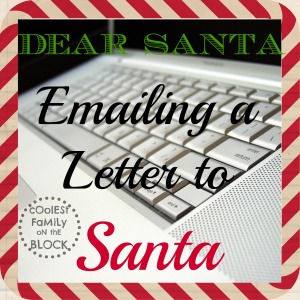
*Dear Santa: Part 4 Emailing a Letter to Santa
*My Letter to Santa 1984 You are here
Other Christmas Posts
*10 Ways to Shake Up Your Christmas Pajamas Tradition
*Phone Calls from Santa
*Uncle Ugly’s Christmas Sweater Jamboree Rules
*Uncle Ugly’s Christmas Sweater Jamboree 2010 Photos and Winners
*Traditions, Truces, and Cartoon Moments
*Food as Tradition: Norwegian Butter Cookies
Coolest Family on the Block is committed to helping you find creative ways to have fun and make memories with your family this holiday season. Don’t miss an idea, tip, or trick…subscribe and have updates sent directly to your email!
*Subscribe via email*RSS*Facebook*Twitter*Networked Blogs*Blog Frog*
Ghosts of Halloween Past: My Childhood Halloweens
I’m writing this post because I really, really want this camera!
Halloween has never really been “celebrated” at our house. We were allowed to dress up as long as we weren’t anything scary/evil. Sometimes we went Trick or Treating but most years we didn’t. Sometimes we carved pumpkins, sometimes we didn’t. My favorite part of Halloween is the costumes. I loved dressing up. Still do (although I haven’t in years). When Halloween would come around mom would take my sister and me to JoAnn Fabrics to look inside the big costume books. We would get an idea of what we wanted to be and then mom would put it together with what we had at home. Unfortunately I don’t have many photos of my costumes. We used a lot of items from home, so whenever possible I tried to use a photo of some of the items even if I’m not in full costume.
Here are the few memories that I have of my Halloween’s past.
1981: Scarecrow
I was too little to remember anything about this. I think this was my first time ever going Trick or Treating. I was just over two and my sister was just shy of one. I was a scarecrow, my sister was a clown, and my cousin was a cheerleader.


1982-1983: ?
Because I couldn’t find any pictures from these years and I was still so young, I have no idea what my costume was. One of these years (I think that it was 1983) we had moved to FL. I seem to remember my sister and I Trick or Treating with our dad who somehow lost his keys in the grass. It was dark outside and he had a hard time finding them. I found the keys. My dad started calling me “Hawkeye”. Little did he know that only 3 years later I would need glasses and now I can only see an inch in front of my face!
1984: Bunny
I actually have no memory of this Halloween at all. From the picture I can tell you that I was a bunny and my sister was a lion. I can also see that this was a church Halloween party.
For being a children’s party at church, there are some pretty creepy looking costumes in the background. (Top photo from left to right) I can’t tell if that’s a giant hat or if the person has a sack over their head. Is that a green-faced bearded lady wearing rubber kitchen gloves and holding a broom? That is actually a Care Bear, but it’s still scary. This clown is way more creepy than fun (ditto for the mini clown in front).

1985: Gypsy
I was in first grade this year. We had a Halloween parade at school. As best I can remember it, each classroom was designated a time when they would walk through the whole school in each classroom (I could be remembering incorrectly…it might’ve just been the other classrooms in your grade). I was a gypsy. I loved my costume. My grandmother had this full, puffy, white slip with red stars all over it (pictured below while playing dress up, not in costume). My mom tied it around me (because it was too big) and I wore some sort of top over it with a brightly colored shawl. Then she tied a scarf onto my head. It was the 80s and my mom had all kinds of big, tacky jewelry. I put on beads and necklaces, some jewelry on my head, lots and lots of bracelets, rings, some ankle bracelets, and I think we even put some big jangley necklaces around my waist. My mom put a lot of heavy make up on me. For shoes I went barefoot because aren’t gypsies always barefoot? (I really don’t know) Since I would be in my classroom being barefoot wasn’t a big deal…but then there was the parade. I walked all over the school in my bare feet. Yuck! I didn’t step on anything or hurt myself, but just the idea of it grossed me out. My sister and I went Trick or Treating that year with a friend of mine and our moms (Don’t worry, I wore shoes!). While we were out we had a spooky encounter, you can read all about it in “A Ghostly Tale”.

1986: Aerobics Instructor
I don’t remember anything specific about this year other than the costume. I wore my bathing suit with tights underneath it, leg warmers, and tennis shoes. I had my hair in a pony tail and wore a head band and wrist band. I wore a sweatshirt over the bathing suit, which I believe had the neck cut out so that it would hang off the shoulder. I seem to remember the bathing suit having white and purple vertical stripes and having a white fabric belt with plastic buckle attached to it. Maybe a little too cold for Trick or Treating, but definitely a cheap and easy costume.
1987: Princess
I wore my beautiful flower girl dress from my aunt’s wedding. A picture of me in the dress at the wedding can be seen below. We bought a scepter at the store. It was almost as tall as me. It was plastic with a red handle and a white star at the top. You could put batteries in it and the star would light up. I hated the red handle so my mom wrapped ribbon all around it and put glitter on the star so that it would shine when it was turned on. I don’t remember anything else about the costume, like what I did with my hair or wore on my head. I think I might’ve been a fairy princess…which means I would’ve had wings. For whatever reason, the scepter is what I remember the most.

1988: Little Bo Peep
I wore my Easter dress from the year before (Easter photo shown below). It always reminded me of Little Bo Peep. We added a poufy crinoline underneath it and I think I might’ve had some pantaloons peeking out down by my ankles. I think we may have tied a bigger, more exaggerated sash/bow around my waist. We put my hair in big baloney curls with a big huge bow. We took the princess wand from the year before and wrapped pink satin ribbon around it. For the crook we removed the star and put a wire coat hanger in there which we bent into a crook and taped to the handle. We then put an empty paper towel roll over the wire crook and wrapped it in ribbon. We tied a big pink satin bow underneath the crook. I carried a stuffed lamb with me which was actually a gift from the Easter Bunny in 1982.

1989: Southern Belle
This year there was a party at the church in the parsonage basement. I remember getting a Polaroid picture taken that night, which I had for years…but can’t seem to find it now 😦 This year I was in Middle School, so no Halloween Parade. Instead there was a costume judging contest. I believe the judging went by grade. You would go to the auditorium and were put in like groups. They kept narrowing down each group until they had the top 3 (5?) costumes in that grade. I believe I was always in one of the top-ish groups. I seem to remember this kid Kevin winning every year. He had some pretty good costumes. For the Southern Belle costume I used a dress that had belonged to my mom as a child. I think that one of her grandmothers had made it for some sort of patriotic holiday. It was blue with little (red?) flowers on it and had a matching bonnet. To make the skirt full my mom took a hula hoop and sewed it to the bottom of the skirt using small pieces of elastic. I had big baloney curls in my hair once again. Since I was a “winter” southern belle I also had a white faux fur muff that I wore.
1990: Cleopatra
I once again was close to being a finalist in the costume contest, but didn’t win. This year we bought my Cleopatra costume from the store. I don’t remember wearing a wig, but at the time my hair had a similar cut (although it was blonde, so…). In addition to what the costume came with we added more heavy gold jewelry around my neck. Slap bracelets were popular then and I had to shiny gold ones that I wore on each wrist like cuffs. The costume had a stretchy gold headband with a cobra attached to it, and I did wear it, but we fashioned one of my mom’s gold necklaces around it to make it look more authentic (and not so cheap). We had a gold snake to wrap around my upper arm. I wore sandals and heavy eye makeup. One thing that I remember most about this costume was that it had a big leg slit. Every time I sat down my skirt flew open and my one entire leg (clear up to my upper thigh) would be showing. I had to keep closing my skirt all day.
1991: Kleenex Box
For some reason I decided that I want to be a Kleenex box. I didn’t win a prize again, but I came close. Everyone loved my costume. I’m not going to give anymore details right now, because I’ll be writing more about this tomorrow!
1992: Kleenex Box
I was so certain that this Kleenex box was a winner that I decided to try it again this year! I was actually a finalist! I think I got 3rd place. Because of the design of the costume, I couldn’t sit in my desk at school. So I “sat” at the front of the class during homeroom. I was holding a real box of Kleenex and the other kids had fun coming up during class and getting Kleenex’s from me. This was a really difficult costume to Trick or Treat in because it was so hard to walk up and down the stairs.
1993: 50s Chick with Poodle Skirt
I was a freshman in high school in 1993. Although I believe that you were allowed to come to school in costume, no one really did. There weren’t any Halloween parties or parades or costume contests, so there was no need to have a costume specifically for school. This year my sister and her friend Julie decided that they would go Trick or Treating. This was the first year that we would ever be going alone. I borrowed Julie’s sock hop outfit. We went Trick or Treating but I didn’t walk up to any doors or take any candy. I felt really stupid and too old. I was 14. That was my last time Trick or Treating.
1994: Hippie
This year I joined the school’s Dance Line which performed with the marching band in the neighboring city’s Halloween Parade. Baby doll dresses were back in style at this time, so I started with that and some leggings for my costume. I added a tie-dye “shawl” that I found in our attic (I think it was a table runner). I put my hair in braids and added a floppy hat and peace sign necklace. I finished off the outfit with some flower power on my face and a pair of “John Lennon” sunglasses (also popular in the 90s).


1995: Flapper
This year I wore a flapper costume to the Halloween Parade. The below photo is actually from a talent show about 5 months before Halloween, but it’s the same thing that I wore except for the shoes. I wore black jazz shoes instead. The costume began as a long black dress with spaghetti straps that I had been given as a hand-me-down. The material was that stretchy, wrinkled kind and the dress was way too long for me (I tripped in it). We cut the bottom of the dress off and then my mom took rows of black fringe and sewed them around the dress and added some to the shoulders. She took some of the cut off material from the skirt and tied it into a headband/bow and then attached more fringe. The gold sequin cap, choker, and garter were all part of an old ballet costume from years before. We attached fringe to the garter and removed the giant blue feathers from the cap. My mom already had the pearls. I added a boa and black hosiery (which had seams up the back, but you can’t tell in the photos). Finish off the look with dramatic make up and spit curls (not visible in the photo).


1996: Genie
In 1996 I was a senior in high school and this would be my last Halloween parade. We bought the genie costume at the store, but embellished it with my mom’s jewelry. Everything hanging off of the hat, the top, and the waist are my mom’s jewelry with added bracelets and arm cuff. You can’t really tell in the picture but I also have a tiny genie lamp hanging from my waist. We took plain white shoes and added gold glitter and sequin. You can’t see it in the photo, but we also painted a genie onto my calf. During the parade some kid came running up to me and handed me an envelope (which I thought was weird). Later on when I got to open it I found out I had one a $5 prize for a good costume. I never bothered to redeem it.


So there you have it, all of my memories of Halloweens past.
I want to thank the SITS Girls for hosting this giveaway. You can go to their website to find the best blogging tips. It’s also great if you’re looking for a way how to find blogs (Hmm, that wasn’t proper English). Also unicorns are real and Tiffany is pretty! (Hey, whatever I can do to get that camera, right?!)
If you would like to read more stories about my childhood you can find links to my “Piggy Tales” below where I recorded my youth and young adult years in 20 posts.
My Piggy Tales:
*My Birth Story – I’m always late!
*Ages 3-5: Naked in a box
*Age 6 First Grade: There’s a bra in my lunchbox!
*Age 7 Second Grade: Bossy Wheels and Shady Deals
*Age 8 Third Grade: I will not talk in class
*Age 9 Fourth Grade: I didn’t really need those fingers anyway!
*Age 10 5th Grade: Nothing’s Scary in the Fifth Grade
*Age 11 6th Grade: Jenny Got Ran Over by her Grandma
*Age 12 7th Grade: Youth Camp Stinks
*Age 13 8th Grade: “Talent” Show
*Age 14 9th Grade: (N)O Christmas Tree
*Age 15 10th Grade: The Newsboys Wouldn’t Ditch Their Friends
*Age 16 11th Grade: Acrophobia Gets You the Good Seats
*Age 17 12th Grade: In School Suspension
My Young Adult Years
*Dreams and Aspirations: The Long Road There
*Friends and Fellowship: Friends Don’t Get Friends Grounded
*My First Job
*How I Met Cool Daddy Part 1
*How I Met Cool Daddy Part 2
*Colonel Mustard on a Rollercoaster with a Plastic Fork

Coolest Family on the Block is committed to helping you find creative ways to have fun and make memories with your family all year-long. Don’t miss an idea, tip, or trick…subscribe and have updates sent directly to your email!
*Subscribe via email*RSS*Facebook*Twitter*Networked Blogs*Blog Frog*
A “Puzzling” Birthday Tradition
I love puzzles. Building puzzles is something that my mom and I have always loved to do together. When I saw that ArtsCow.com was offering 200 piece photo puzzles for $9.99 shipped…I knew I had to get one made for Adaline’s birthday. I chose the following photo from her birthday party.

I received the puzzle in the mail a few days ago. I decided to build it to make sure all of the pieces were there. Here’s the final result.

Yay, all the pieces were there! I think this is something that I’d like to do for birthdays every year (and maybe Christmas too!). (Once they’re old enough) during the month leading up to the child’s birthday they can build their different birthday puzzles. Hopefully they’ll enjoy building puzzles with their mommy as much as I did! If not, I guess my mom and I will just build them anyway in honor of the birthday kid.
My only problem with the puzzle was that it didn’t come with a box. I didn’t know that. It didn’t say anything about a box, but I just assumed (my first mistake). It didn’t even come in a box, it was shipped in a bag. And the bag isn’t even a resealable one 😦

Right now I’m keeping it in a zippered plastic bag. I’m wondering if I should try to find/make a box to resemble a puzzle box or just do a plastic container with a copy of the photo on it. Any suggestions?
If you are intrigued with how I was able to solve this mind-boggling 200 piece puzzle you might want to check out Pointless Tutorials: How to build a jigsaw puzzle so that you too can become a puzzle building mastermind like myself.
Good day to you.
P.S. I’m sorry to tell you that the $9.99 shipped deal for the puzzles is over now. They always have something going on sale, so if you’re interested sign up for their emails.
Posts COMING SOON…
Balloon Wreath Tutorial and Links Post
Ladybug Picnic Centerpiece Tutorial
Free Ladybug and Bug Fonts Links Post
Ladybug Picnic Products List
(I’ll be creating a separate post that contains all of the info and links for the supplies from this party. In the meantime if you want to know where I got something just ask in the comments.)
Related Posts
BIRTHDAY TRADITIONS
*Birthday Traditions: Personalized Birthday CD
*Birthday Traditions: Knife and Cake Server
*Birthday Traditions: Professional Photos
*Birthday Traditions: Photo Puzzle
*Happy 2nd Birthday, Adaline!
BIRTHDAY TUTORIALS
*DIY No Sew Party Hat Tutorial

*Ribbon Topiary Video Tutorial (Centerpiece)

*Tissue Number Birthday Sign (Mini-Tutorial)

BIRTHDAY PARTIES
*Birthday Girl…2 years old: Photos of Adaline at her birthday party
*Ladybug Picnic: 2nd Birthday

*Pink and Green Polka Dots and Cupcakes Party: 1st Birthday

*Ham and Man Party: 30th Birthday

*Celebrating 30 years in 30 days! All of my birthdays from 1980-2009
+Birthday posts will be published all throughout September 2011 including tutorials, party decor ideas, and birthday traditions!

Coolest Family on the Block is committed to helping you find creative ways to have fun and make memories with your family all year-long. Don’t miss an idea, tip, or trick…subscribe and have updates sent directly to your email!


%20%23birthday%20%23traditions%20)

)