Category Archives: Halloween

Easy Last Minute Halloween Costumes

This year the Cool Family opted for some extremely cheap, simple, and easy no-sew Halloween costumes.

Thankfully Adaline insisted on being a Black Cat this year. I was going to go the leotard route but figured it was pointless to spend the extra money, especially if she would end up being too cold. She wore a black long sleeved shirt and black pants that she already had. We got a cat kit for $5 at Target which included the ears, tail, and bowtie (it also came with a weird nose, but it looked awkward). A little eyeliner nose and whiskers and we’re done!

Jon wanted to be a scarecrow. The costume was simple: overalls and flannel shirt. Jeans would work as well especially if the shirt is a little longer and you could cinch the waist with some rope. For the straw “cuffs” I just tied some yard into a circle and then tied yarn around it and put it on his wrists and shoes. For the hat/hair I stuck pieces of yarn to duct tap and then safety pinned the strip of duct tape to the hat. Simple! I was going to put a scarecrow nose and stitched mouth on him, but he wouldn’t let me 😦

When I was 2 years old I was also a scarecrow for Halloween. That’s me on the left. Do you think Jon and I look alike at all?

I decided to go as a nerd because I only needed a few accessories to complete the costume: nerd glasses, suspenders, and a bowtie. I will tell you that I’m not happy with my accessories at all. We went to Party City because it was closer and these were the only options. I think the glasses are too “trendy”, the bowtie is too “cocktail waitress”, and it was all pricier than I would’ve liked. After I’d already bought the stuff I found cheaper and more appropriate accessories at a Halloween store at the mall. So I’m disappointed.
Nerd glasses, suspenders, bowtie: Party City 2014
Nerd knee socks: Target 2014 (I already had these, because they’re awesome)
Hair Pom Poms: Gymboree 2010 (They’re Adaline’s, I thought they worked perfectly)

Because I wasn’t entirely thrilled with my nerd costume (I hated the bowtie in particular), I decided to change it up and go specifically as a Harry Potter Nerd or a Potterhead, if you will. I already had the awesome Gryffindor t-shirt and scarf, and the round Harry Potter glasses. Yes, I already had those, just for every day use. Because, shut up.
Harry Potter Glasses: Amazon
Gryffindor T-shirt: Wal-Mart 2014
Gryffindor Scarf: Universal Islands of Adventure 2011
Nerd glasses, suspenders: Party City 2014
Nerd knee socks: Target 2014
Hair Pom Poms: Gymboree 2010

It ended up being chilly so I wore a gold cardigan that I already had that matched perfectly and in the end I decided to wear the nerd glasses instead of the Harry Pottery glasses. Fascinating stuff, right?
Gryffindor T-shirt: Wal-Mart 2014
Gryffindor Scarf: Universal Islands of Adventure 2011
Gold Cardigan: Target 2013
Nerd glasses, suspenders: Party City 2014
Nerd knee socks: Target 2014 (I already had these, because they’re awesome)
Hair Pom Poms: Gymboree 2010 (They’re Adaline’s, I thought they worked perfectly)
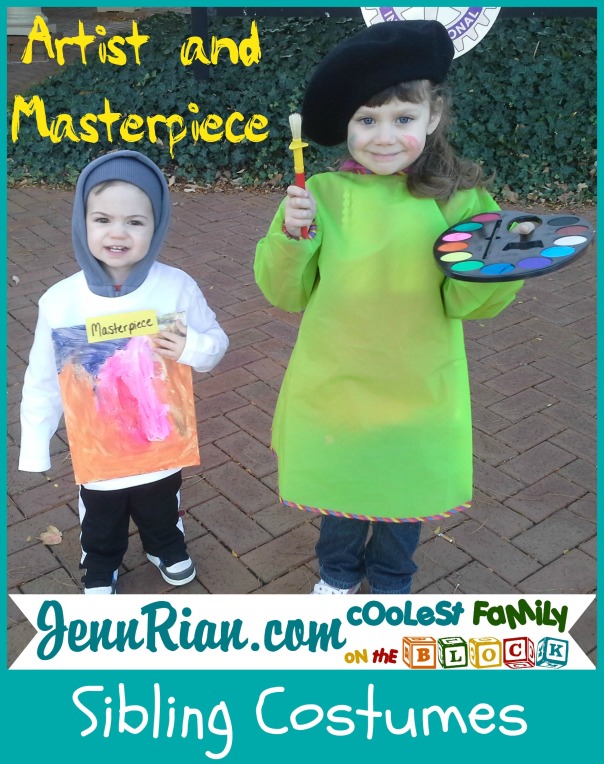
Last year Adaline and Jon went as an Artist and Masterpiece.
Click for costume details.
What did your kids dress as for Halloween this year?
What’s your favorite go-to last minute costume?
Let me know in the comments!


Visit my other blog: JennRian.com. It’s pointless, sarcastic, and mildly amusing.

Healthy Halloween Snacks


We were in charge of bringing classroom snacks for the Kindergarten Halloween party. Homemade treats were not allowed (which is just as well since I don’t cook or bake). I really get tired of all of the junk my kids accumulate from October to January during the holidays, so I really didn’t want to give the kids loads of sugar. Instead I prepared healthy snacks (fruit and cheese) with a fun “Halloween” twist…and they got organic lollipops as well. Yep, I’m one of those super fun parents :P.
(Don’t worry, they also got store bought cookies filled with sugar and artificial junk and bags of artificially colored Cheetos 😦 That was my husband’s doing. He’s everyone’s favorite.)
These healthy Halloween snacks were ridiculously easy to make. Seriously, I can’t express to you enough how quick and simple this was! I made 16 of each and it only took about half an hour to complete. I know, right?! All you need is a black Sharpie Marker!


These String Cheese Ghosts were the easiest to do. I just drew little ghostly faces on the back of a cheesestick and was finished in only minutes! Effortless!


Using a Sharpie marker I drew Jack-O-Lantern faces onto oranges. Okay, okay…so they were Halos or Cuties which are technically Mandarin Clementines. But I’m still going to call them “oranges” anyway because this is my blog and I’m a rebel that laughs in the face of accurately classifying fruits by their proper species and binomial name. Suck it, science!


I’ve seen these Banana Pirates around cyber space for years now. They’re not particularly “Halloween-y” but I still thought they were cute and fun. Halloween is a time you can dress up and be whatever you want…so can your banana! Maybe if I wasn’t so lazy I could’ve come up with a different more appropriately themed “character”, but this will have to do.


What are your kids’ favorite healthy Halloween themed treats?
What other creative character can you turn a banana into?
Do you call Clementines “oranges” too?
Let me know in the comments!
Need last minute Halloween Costumes for siblings?
Check out these adorable and easy Artist and Masterpiece costumes!

Visit my other blog: JennRian.com. It’s pointless, sarcastic, and mildly amusing.

Artist and Masterpiece Sibling Costumes
%20No-Sew%20Halloween%20Costumes!)
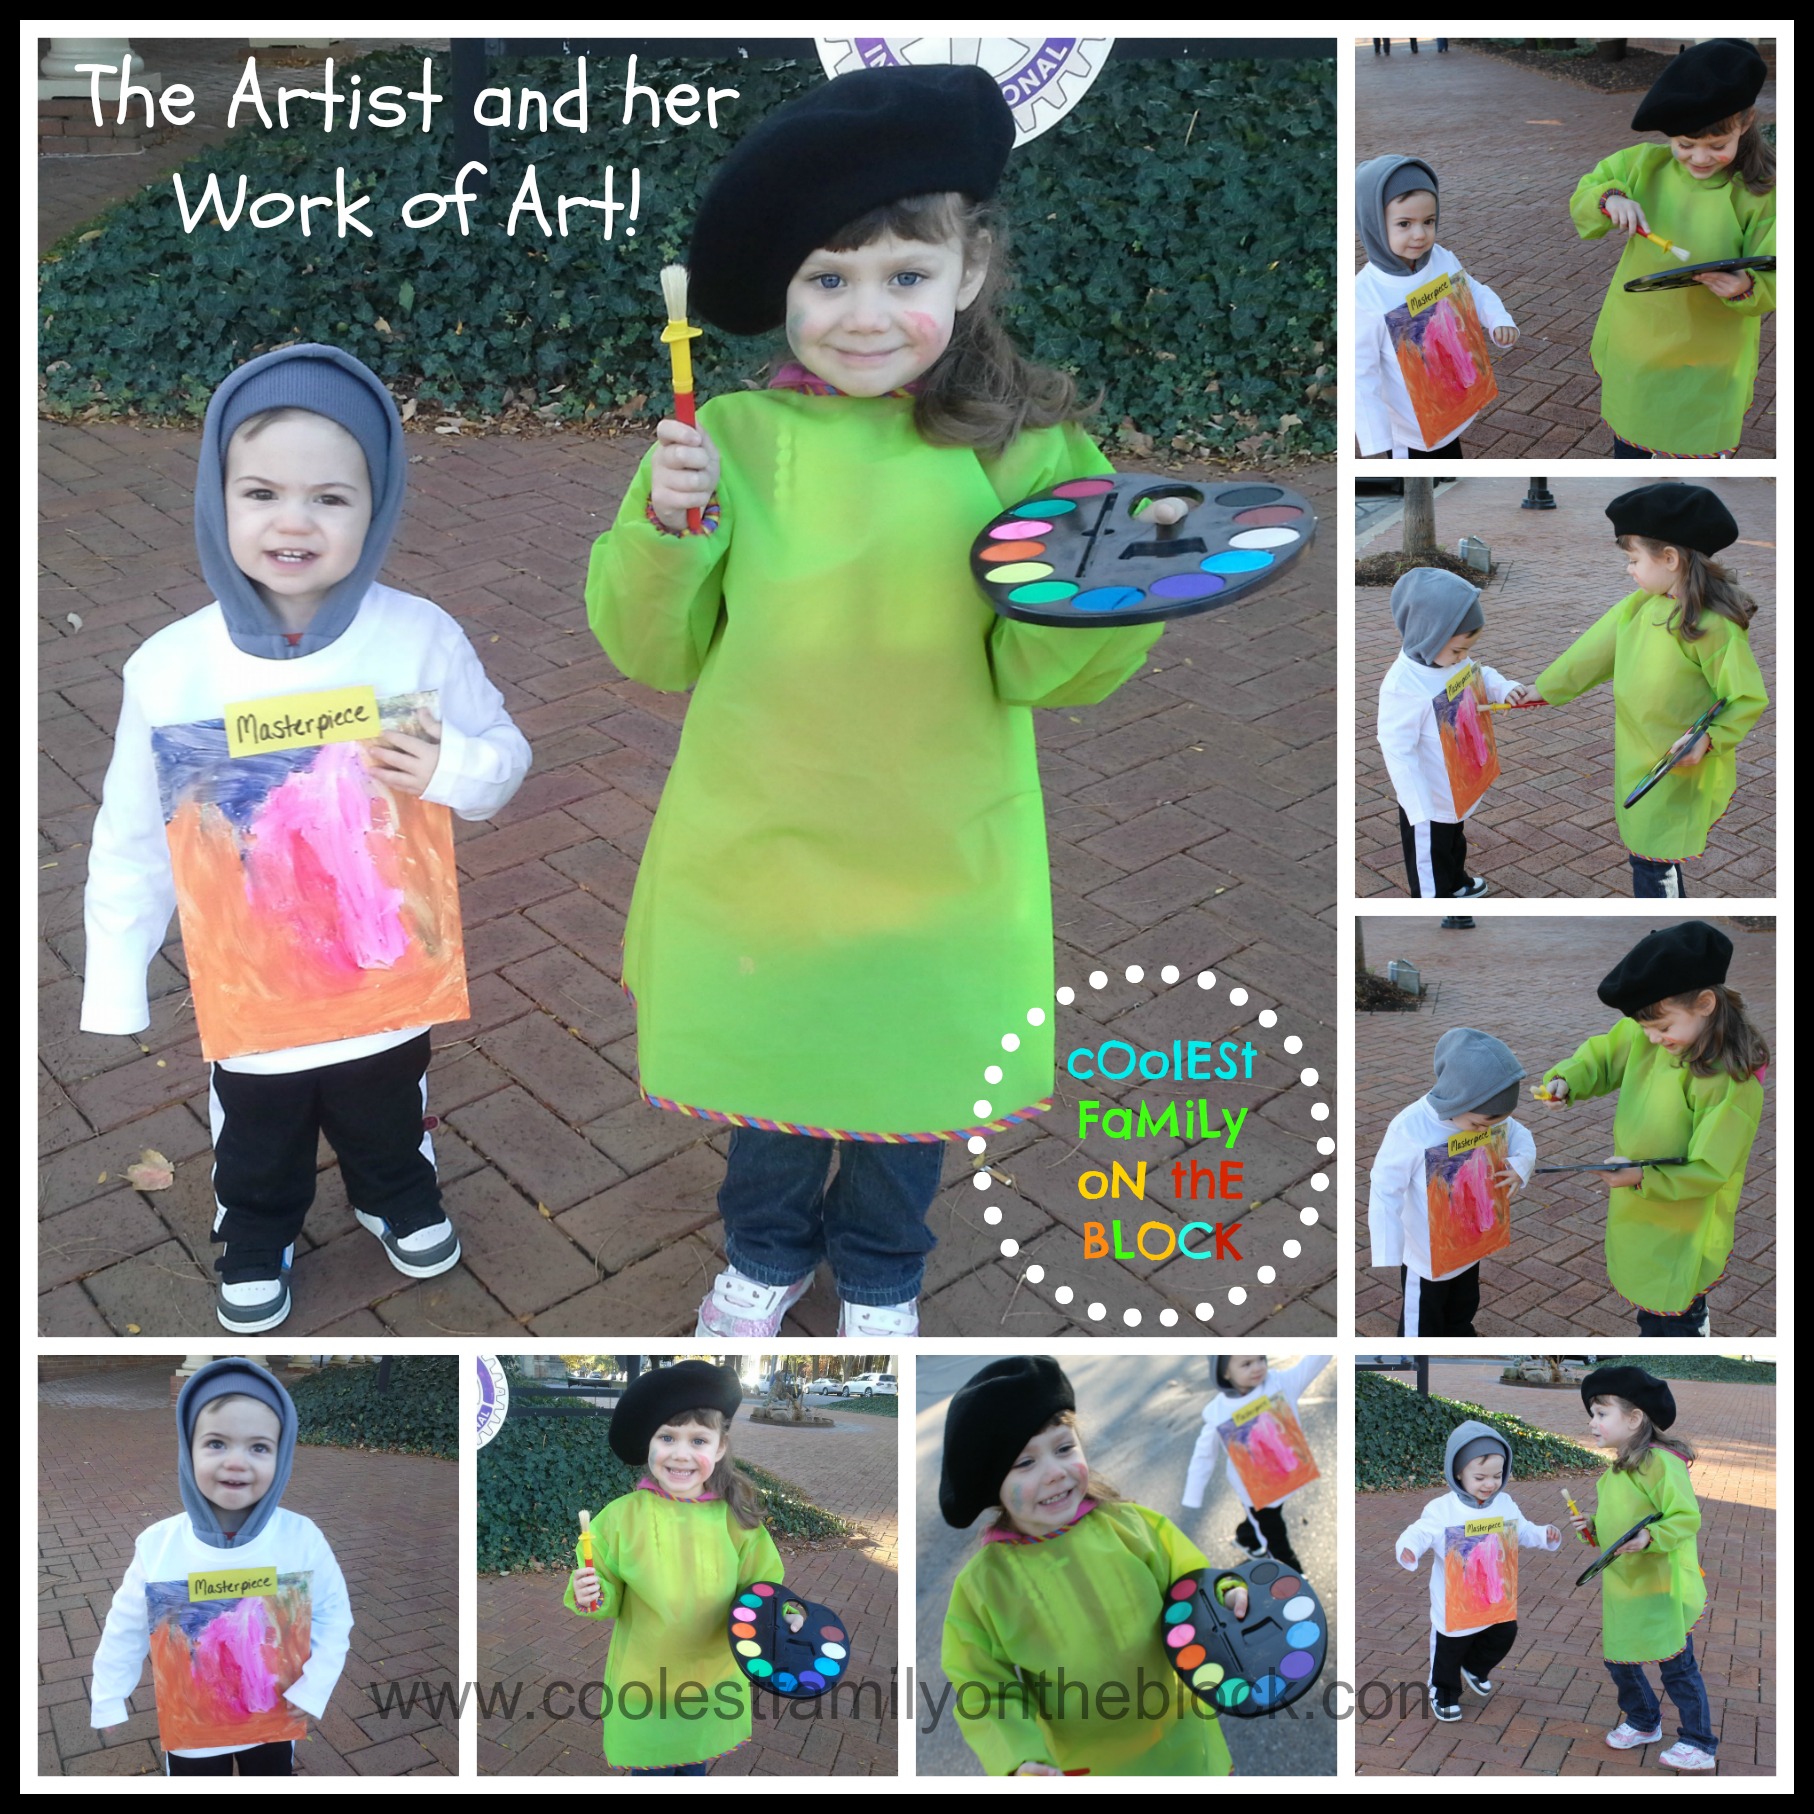
I am lazy. I don’t sew and I refuse to spend $30 on a child’s costume that is ugly and will fall apart. My 4 year old daughter kept changing her mind about her costume from ghost to kitty to my personal favorite, “I just want to be a regular little girl”. My daughter loves, loves, LOVES to draw and paint and so I suggested that she be an artist. She loved the idea. She loved the idea even more when I said that her little brother could be her work of art and that she could (pretend to) paint him. So simple and easy!
)
The costume was a huge hit! We got a lot of compliments on how cute and creative the concept was. It was mostly laziness rather than creativity, but hey, I’ll take it!

)
ARTIST/PAINTER COSTUME
-Art Smock / Art Apron / Old button down shirt
-Beret
-Artist’s Palette
-Paint Brush
-Paint smudges on face and smock
-Pencil mustache (optional)
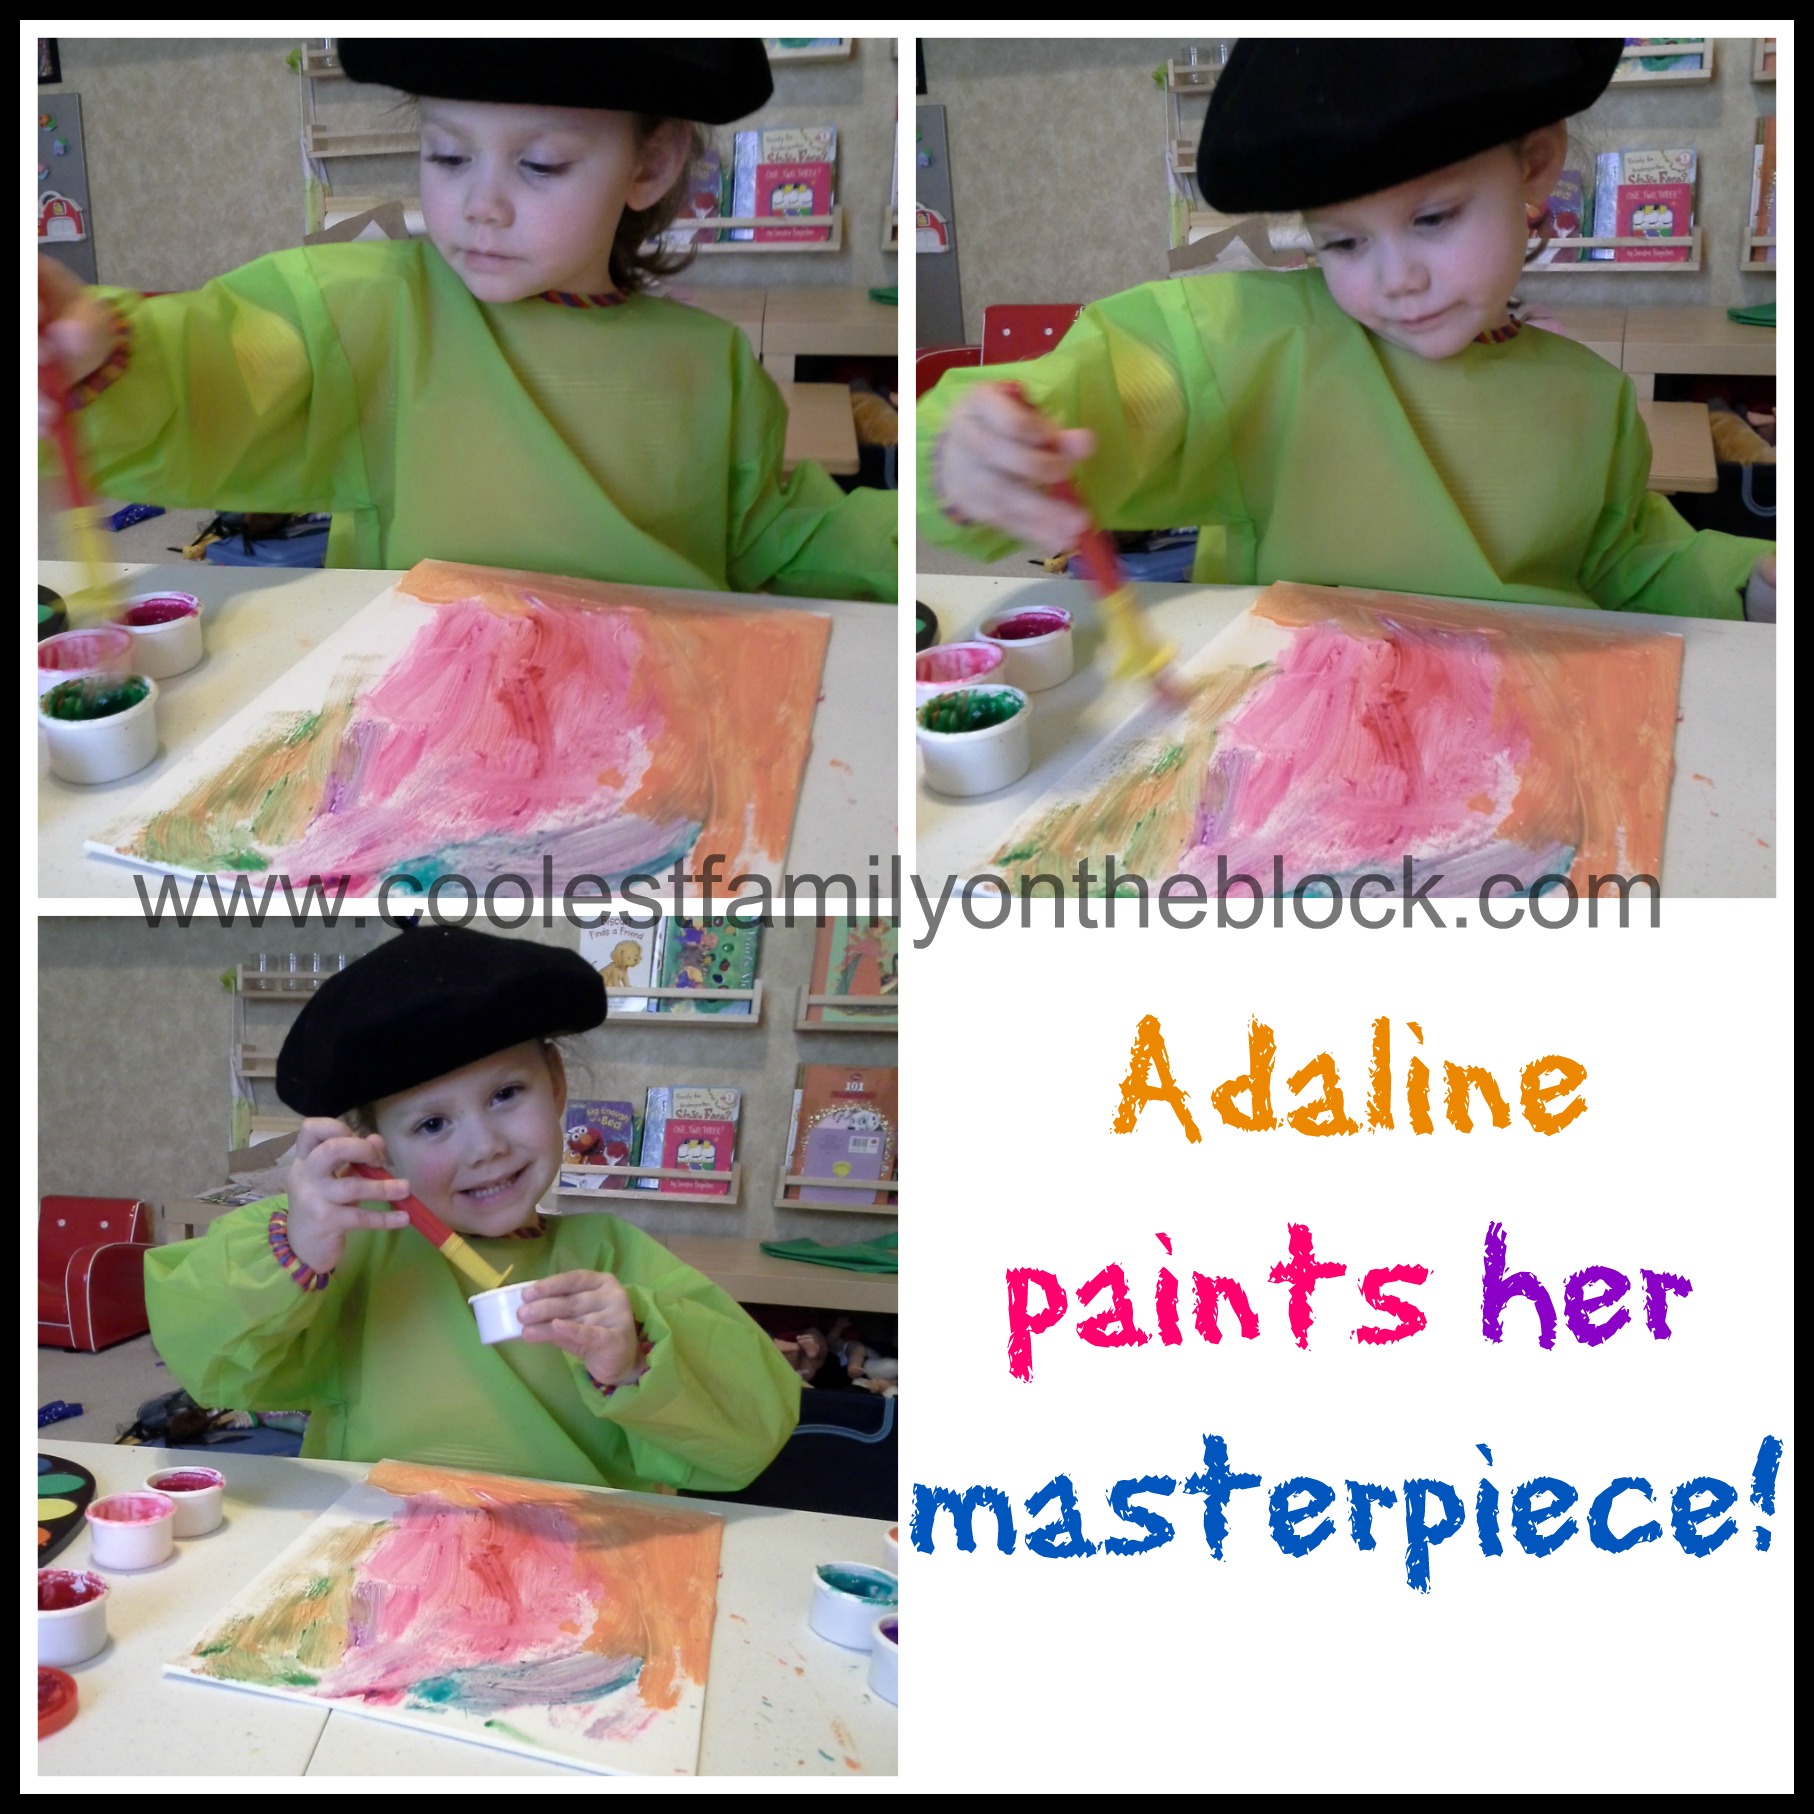
My daughter already had this art smock from Ikea. I wanted to have paint splatters all over her, but that smock wipes up so nicely that nothing will really dry on it 😦 I found the beret on Amazon and I had a Swagbucks giftcard, so it was free! I got the artist’s palette and paint brushes at Michael’s. We have paintbrushes at home but I wanted something a little bigger. There was a less expensive plain white palette but I let Adaline choose which one to get. She chose the watercolor palette which was fine because she would definitely use the watercolors and now I didn’t have to add paint to the white palette for her costume.
If you don’t have an art smock you can use an old white button down shirt as a smock. Be sure to smear it with lots of paint…artists are never clean! If you don’t have a palette and don’t want to buy one you can always make one by cutting the shape into cardboard or cardstock and coloring in the paint. That was more work than I wanted to do (remember the keyword today is “lazy“), so the $4 I spent on the palette was worth it to me.
I also think it would be cute to draw a curly mustache on your artist, but my daughter was having none of that!
)
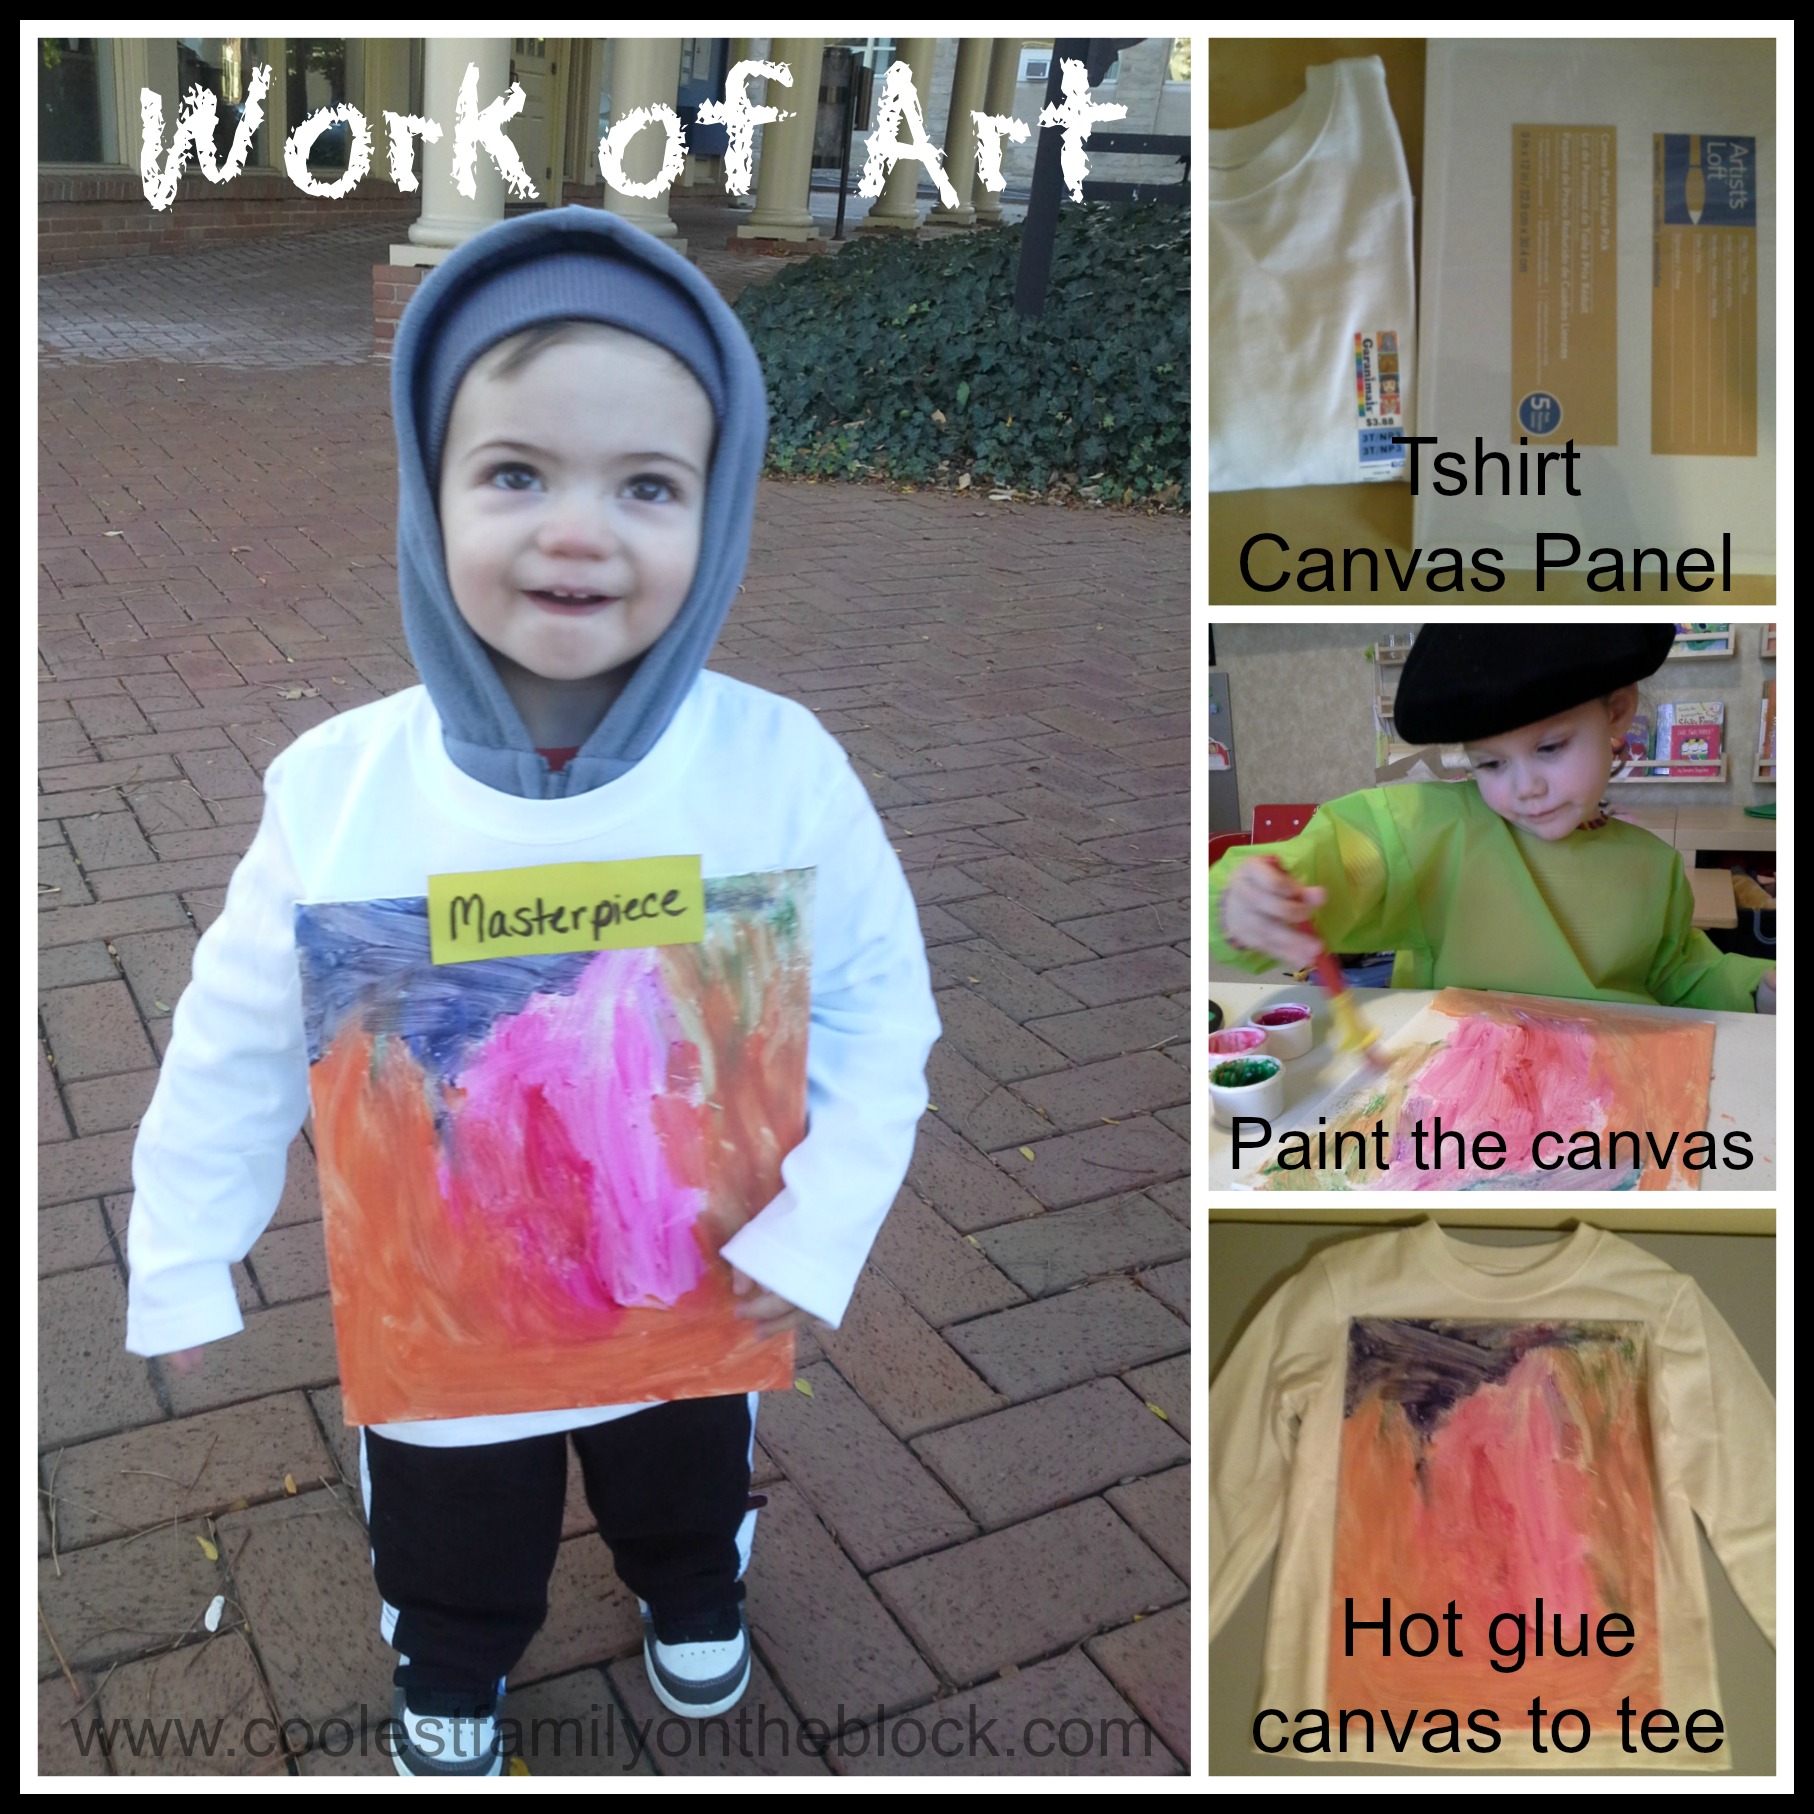
MASTERPIECE/WORK OF ART COSTUME
-Long-sleeved white shirt (a few sizes bigger)
-Painted Canvas
-Picture Frame (optional)
-Hot Glue Gun (to glue the canvas to the shirt)
My original idea for the masterpiece was to use larger canvases and have my son wear them hanging over his shoulders sandwich board style. He’s 20 months old and falls over for no reason at all sometimes, so when I saw the smaller 9×12 canvas panels I got the idea to hot glue it directly to his shirt instead. I also thought it would be really cute to glue a frame from the dollar store around the canvas, but I didn’t think that sounded too comfortable or safe for my little boy. Instead I just added the little sign that said “Masterpiece” so that I didn’t have to keep explaining the costume to people. It worked brilliantly and we got a lot of compliments 🙂
It’s important to note that I got my son’s shirt a little larger (he wears 18-24m and this shirt is a 3T) because you need the extra room once the canvas is glued to the shirt. If the shirt were any smaller I wouldn’t have been able to fit it over his head.
The canvas panels I used were a set of 5 from Michael’s. You can get single canvases as well, but they didn’t have any at Michael’s and I knew that my daughter would use all of them.
Instead of using a canvas you could use card stock, card board, poster board, a pillowcase, just about anything that you can paint/draw on and then attach to or hang from a shirt. You can even just draw/paint directly onto the shirt itself. It doesn’t get any easier than that!
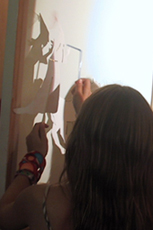
Adaline actually painted the canvas herself. After it dried I hot glued the canvas onto a long sleeved tee.
Here’s the list of actual items that I used:
(None of these are affiliate links)
SMOCK: Ikea MÅLA Long sleeve apron, green $3.99
PALETTE: Michael’s Creatology Watercolor Palette $3.99
PAINT BRUSH: Michael’s Creatology Brushes (Set of 3) $1.99
BERET: Classic Black Wool Beret Cap $5.91 Sold by Accessory World on Amazon.com
TEE: Garanimals Long Sleeve Basic Tee $3.88
CANVAS: Michael’s Artist’s Loft 9×12 Canvas Panel Value Pack (5 pack) $7.99
Did your kids dress up for Halloween this year?
What is your favorite “lazy” Halloween costume?
Let me know in the comments!
This post is linked to: Skip To My Lou: Made by You Monday / Clumsy Crafter: Costume Link Up / Kids Activities Blog: It’s Playtime / SITS Saturday Sharefest / The Mom Creative: Halloween Costumes Link Up
*If you’d like a laugh (or nightmares) read about 1984 Creepy Costumes on my other blog.
Read my personal blog www.imakemyselfthequeen.com.
")
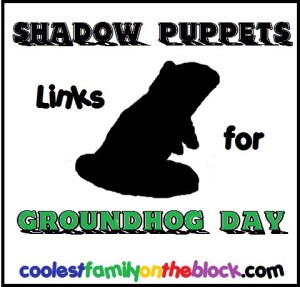
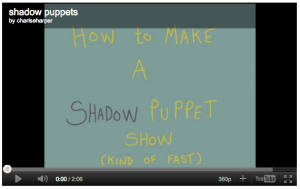
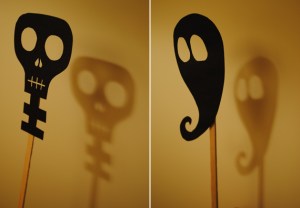
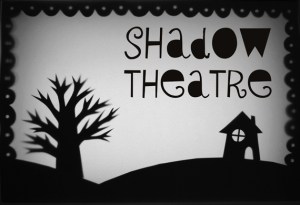
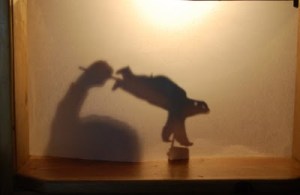
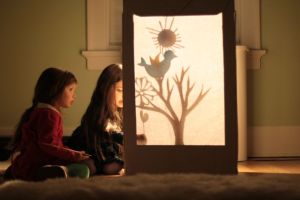
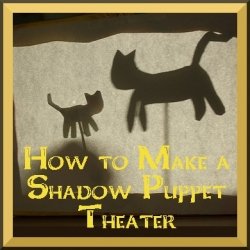
How to Make Shadow Puppets (Links)


ATTENTION PINNERS: If you are pinning this post, please pin one of the images above.
To pin one of the images below, please click through to the original source
and pin the image from there. Thank you for pinning responsibly.
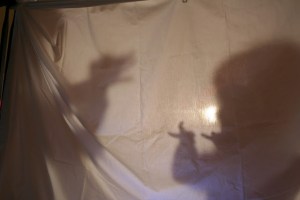
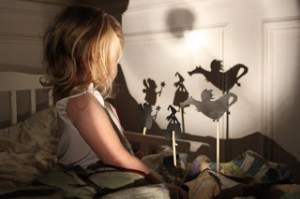
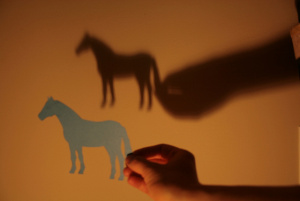
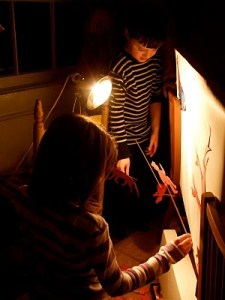
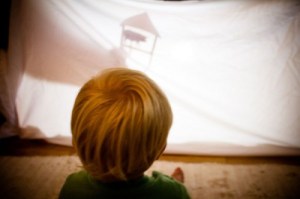
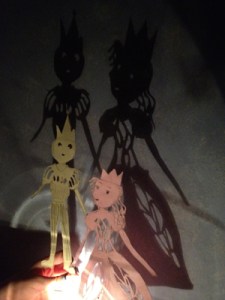
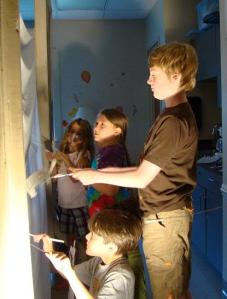
If you’d like to learn to make shadow puppets with your hands, shadow puppets with paper, or a shadow puppet theater…try one of the many links below. Shadow puppets are a great activity for Groundhog Day or Halloween and kids love them!
Click here for more Groundhog Day ideas
If you need to get your room completely dark during the day, check out my review for the awesome room darkening shades Blackout EZ Window Covers!
![]()
 *Shadow-Puppets.com
The most difficult hand puppet subject may be accomplished after only a few minutes.

*Fun with Shadows for Home Entertainers (Jan, 1930) @ Modern Mechanix
This feature explains how anyone can cast the shadows of sixteen different figures, an accomplishment which will provide many full evenings of entertainment for either children or adults.

*How to Make Shadow Puppets @ About.com/familycrafts
Teach your kids to have fun without their toys by bringing shadows to life. See how to make a dog, swan, and bunny rabbit with nothing but your hands, light, and a little imagination.

*Shadowy Days @ Little Page Turners
I stretched a sheet between two chairs, placed a naked lamp on the ground, and voila! We had ourselves a shadow puppet stage.
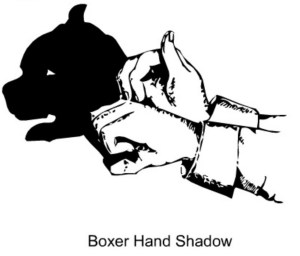
*Hand Shadows @ Apples 4 the Teacher
What a delightful way to expand on the concept of the Groundhog’s shadow – teach children how to make their own shadow characters! These can be made in front of an overhead projector or behind a hanging sheet with a light source.
![]()
*Showy Shadow Puppets @ Disney Family.com
Animal Hand Shadow Tips: Puppy Face, Spider, Goose, Elephant Head

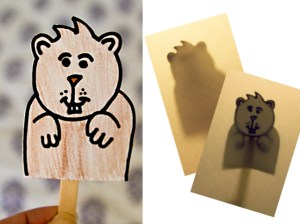
 *Kid Craft: Make a Groundhog Shadow Puppet
by Modern Parents Messy Kids @ Momtastic
Here’s a fun kid craft that’s part art project, part puppet show
*Shadow Puppets for Kids @ Drawing Mom
Video
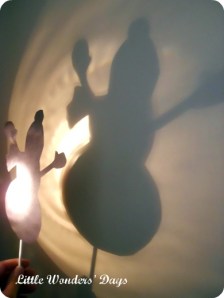
*Winter Shadow Puppets @ Little Wonders Days
They played with making the shadows bigger, smaller, and disappear altogether by moving their flashlight or the puppet.
*Shadow Shapes Craft @ Crayola.com
Regardless of whether the ground hog sees his shadow or not on February 2, kids can create their own Shadow Shapes—and make them all year ’round.

*Shadow Puppets @ Spoonful.com (formerly FamilyFun)
Your kids can cast a shadowy show of their own with just a few of these simplified paper puppets and a tabletop stage.
*Shadow Puppets (Free Printable) @ MarthaStewart.com
This craft is easy and fun plus it’s a great way to entertain young children! (Free printable polar bear or muskox puppet template.)

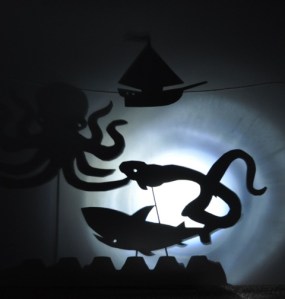
*How to Make a Shadow Puppet (Free Printable) @ Frolic Blog
The template for an octopus, a shark, a wolf eel and a ship.
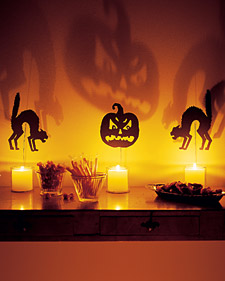
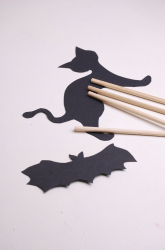
*Halloween Shadow Makers (Free Printable) @ Mini Eco
The best thing is that they are very easy to make – all you need is some black paper, a craft knife, sticky tape and some wooden sticks.
*Shocking Silhouettes (Free Printables) @ Martha Stewart
As day turns to night, call on candles to cast an eerie glow throughout your home. When fierce silhouettes are propped above them, spectacular shadows dance across the walls.
*Shadow Puppets @ While Wearing Heels
The possibilities for making your own shadow puppets are endless and the cost involved is next to nothing.
*Shadow Puppets and Their Presentation
@ MagicalMoonshine.org
In shadow puppetry you are limited only by your imagination! Go make some fun puppets!

*Shadow Puppets @ Martha Stewart
More elaborate shapes require some supplementary materials, such as our templates for a shark, sea horse, angelfish, tuna, crab, and mermaid.
*How to Make Shadow Puppet @ The Organic Lemon
They are easy to make, affordable and provide hours of entertainment for little ones!
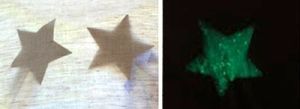
*Glow-in-the-Dark Star Shadow Puppets
by willowday @ The Crafty Crow
The shadow puppet can be used for: 1) a window shadow puppet 2) a flashlight shadow puppet (Something for summer nights in tents) and 3) a glow-in-the-dark toy or decoration.
*Make a Shadow Puppet Play @ Acorn Pies (also found here)
”For the theater, you could stretch a white sheet across a doorway, glue vellum to a wooden canvas stretcher, or like me, tape one-ply white paper to an old metal frame from the attic.”
*Shadow Puppets (Free Template) @ Education
Make the most of some ordinary household supplies to create this fun puppet craft that hails from Indonesia.
*Shadow Puppet Cutouts @ hvanrossum.com
*Shadow Puppets (free printable) @ National Wildlife Federation
Dolphin, fish, starfish, octopus, squirrel, rabbit, turtle, butterfly

*Easy Shadow Puppet Show @ Rhythm of the Home
”We stretched a sheet over two chairs in our living room. We attached the sheet to the chairs using clothespins, and stretched it all tight by using the weight of the chairs themselves.”
*Make Bedtime (even more) Theatrical with Shadow Puppets
@ Canadian Family
”We just lay down with our puppets close to the wall and shone a flashlight right on them.”
*Make Shadow Puppets @ Squidoo
Illustrated step by step directions how you can make your own shadow puppets, set up your stage, and put on a shadow puppet play.
*Kid Craft: Shadow Puppets @ Gardening without Skills
We got two barstools and stretched out a piece of freezer paper in between the stools and taped it in place. We put a halogen desk lamp behind the stools and turned off the lights in the room.

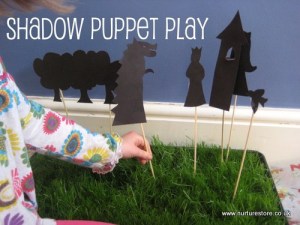
*Shadow Puppets @ Nuture Store
Puppets are a wonderful way for children to work out real-life relationships and develop their language – and so much fun to make!

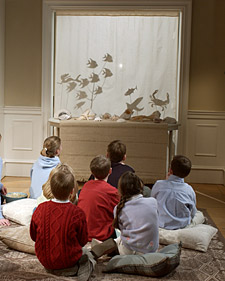
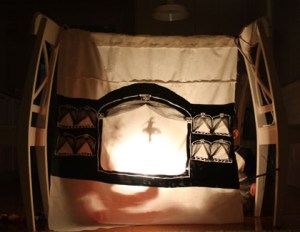
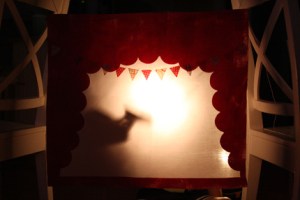
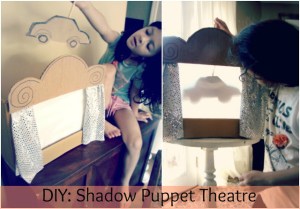
Make a Shadow Puppet Theater
*Cereal Box Shadow Theater @ Mini-Eco
This cereal box shadow theater makes a great project for an older child. It’s really simple to make, and can be made from household scraps.
*Shadow Puppet Theater Tutorial @ Givers Log
Supplies: Freezer paper, Elmer’s Glue, Masking tape, permanent fabric paint (like textile paint or acrylic), sponge brayer for applying paint, Fabric that will let a little light through, Tulle (optional)
*DIY Shadow Puppet Theater @ Givers Log
”Tie a piece of string between two chairs and clothespin your theatre to the string. All you need is a flashlight and a puppeteer or two and you’re ready for a performance.”
*Little Light Theatre @ Home Adventurer
”At home we simply transformed our little entrance hall into the theatre; using a floor lamp for illumination, and a small table covered with a large sheet of baking parchment* as a screen.”
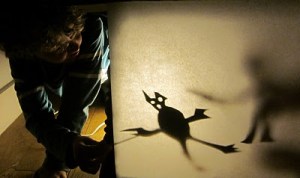
*Table Top Shadow Puppet Theater
@ Spoonful.com (formerly FamilyFun)
Your kids can cast a shadowy show of their own with just a few of these simplified paper puppets and a tabletop stage.

*How to Build a Simple Shadow Puppet Theater
@ Inner Child Fun
Shadow puppet theater was made from an empty cardboard box with the bottom cut out, and replaced with two sheets of white tissue paper held in place with packaging tape.

*Shadow Puppet Theater @ Make Monthly
*DIY Shadow Puppet Theatre @ Salsa Pie
Here’s an easy way you can turn a cardboard box and some freezer paper into a shadow puppet theatre!
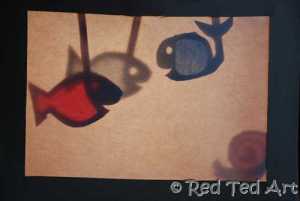
*Shadow Puppets Cereal Box Theatre @ Red Ted Art
*Shadow Puppet Theatre @ Kirsten Rickert
*Shadow Puppet Theater @ Squidoo
Making a shadow puppet theater is an inexpensive family time activity that will build memories. All you need is a cardboard box (a cereal box works very well), scissors, tape, thin white paper or wax paper, and either straws, craft sticks, or skewers.
RELATED POSTS:
Fun Ideas for Groundhog Day / Groundhog Day Goodies / ”I Love You” Shadow Groundhog Day / Valentine’s Day Tradition
Product Review: Blackout EZ Window Covers
The easy way to darken a room!

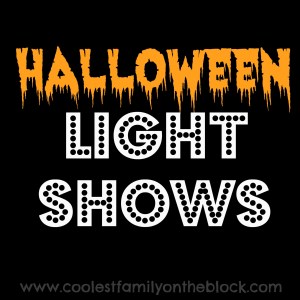
Awesome Halloween Light Shows
I saw this first video on Facebook, so I looked it up on You Tube and was thrilled to find a bunch of similar videos. I’m not a fan of Halloween, but I am a fan of awesomeness…so here are some videos of awesome Halloween Light Shows.
(Email and feed readers, please click the links below or click through to the blog to view the videos.)
Halloween Light Show 2010: Thriller
Halloween Light Show 2010: Monster Mash
Thriller Halloween Display 2009
Ghost Busters Halloween Display 2009
Halloween Light Show 2010: Thriller
I had to narrow the list down somewhere, but you can find even more videos like this by doing a You Tube search for “Halloween Light Shows”.
Halloween Crafts: Kleenex Box Costume
So there’s this awesome giveaway going on over here where you can find the best blogging tips. To enter you need to write a post about something you’ve created for Halloween.
I am not a crafty person. I don’t cook/bake. And we’re not really “into” Halloween. But I really want the camera!!! So, here’s what I came up with.
When I was in 7th grade I came up with the brilliant idea to be a Kleenex box for Halloween. While my mom did most of the hands on work, the concept was all mine. I’m going to tell you how we “created” the Kleenex box.
1. We got a large cardboard box (an appliance box for a refrigerator or stove). We turned the box upside down cut a hole in the top for my head and a hole on each side for my arms. We trimmed up the bottom of the box until I was able to walk in it without tripping.
2. We got contact paper and completely covered the box.
3. Using a real box of Kleenex as a guide we added a label/logo and price to the front of the box using construction paper, markers, and crayons. At the bottom edge of the box I put the information for the size of the box…just like on the real one!
4. Underneath the box I wore a white turtleneck, pants, and white tennis shoes. You want something that blends into the box well, but will also be warm and comfortable.
5. We took white tissue paper and stuck it out of the top of the box to look like Kleenex coming out. Looking back, if we would’ve been more ambitious, it would’ve been neat to fashion some sort of tissue paper hat to wear.
6. I carried the real “matching” box of Kleenex with me everywhere.
*Note that this costume was very difficult to Trick or Treat in because it was hard to get up and down the stairs. You’d need to cut the box up really short (possibly to the waist) to be able to move around easily.*
Unfortunately I don’t have a photo of me wearing the Kleenex costume 😦 But, a year ago I was at my mom’s house and I saw something outside by the trash. I didn’t know that my grandmother had saved that Kleenex box all of those years and kept it in the basement. My mom finally discovered it and set it out with the trash. When I saw it I had to snap a picture of it. It was actually sitting in the grass upside down, but I turned the picture around for your convenience. It looks pretty beat up after spending 20 years in the basement…but hopefully you get the general idea.
Here are the only 3 photos that I have of my Kleenex Masterpiece!


If anyone ever decides to use this idea (or you already happened to have made a Kleenex box costume) I would love to see your photos of the finished product! If you’d like, I’d be happy to post the photos here and/or link up to your blog post about the costume.
So there you have it. My lame attempt at being crafty is to tell you about a costume that I made 20 years ago and then show you photos of garbage (literally).
To read a post about all of my childhood Halloweens and costumes click here
To see the “Halloweens Past” link up at SITS click here.
I want to thank the SITS Girls for hosting this giveaway. You can go to their website to find the best blogging tips. It’s also great if you’re looking for a way how to find blogs (Hmm, that wasn’t proper English). Also unicorns are real and Tiffany is pretty! (Hey, whatever I can do to get that camera, right?!)


%20%23birthday%20%23traditions%20)

)