Author Archives: Jenn Rian
Jenn’s 2nd Birthday Party 1981
Unfortunately, I don’t have many photos of my second birthday.
The few photos that I have aren’t very good, so this will be a short post.
Theme: Holly Hobbie

Above is the Holly Hobbie cake that my mom made, and the back of my head!

 I am the shadowy girl in the darkness.
To learn about Holly Hobbie visit Hollyhobbieworld.com
You might be interested in checking out my daughter, Adaline’s, first birthday party
You can take a look at my 1st Birthday by following the link on this page
Be sure to check back tomorrow to see my 3rd Birthday!
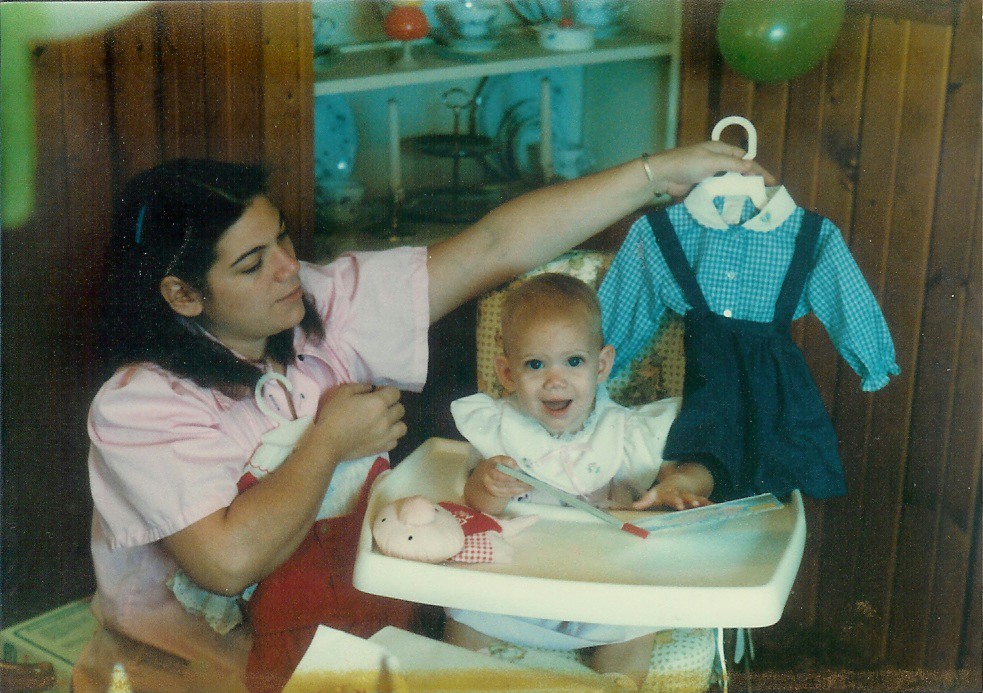
Jenn’s 1st Birthday Party 1980

- Cottage Cake for Jenn’s 1st Birthday


The Birthday Girl


That’s all of the photos that I have. If any family out there has more pictures from my first birthday party, please send them!
If you haven’t already, head over to Adaline’s first birthday party post and take a look!
You can take a look at my other Birthdays by following the links on this page
Pointless Tutorials: How to build a jigsaw puzzle
Since I was already going to build the puzzle that I got for our new birthday tradition, I figured that I’d offer to you, my dedicated readers (hi mom!), a pointless tutorial on how to build a puzzle. Here goes.
Step 1: Get a puzzle. You can buy one or borrow one. I have never heard of puzzle rental, although you can find anything on the internet these days, so it’s worth a google if you’re interested. Please do not steal a puzzle as we here at Coolest Family on the Block do not condone any form of thievery (even if we think that pirates are cool…cause they are). This includes “borrowing” one from someone without first asking permission. Your mom would be so disappointed in that behavior.
Step 2: Open the puzzle box. This could get tricky. If it’s a brand new puzzle they aren’t easy to open. Explosives work best. If you don’t have any explosives, then I recommend having a responsible adult use a knife or scissors to open it…be very careful. If the puzzle that you have has been opened before, the integrity of the strength of the bottom box may have been compromised, particularly if the puzzle is old. This can result in puzzle pieces going everywhere when you attempt to open the box. You likely will always be missing at least one piece no matter how hard you look or how often you clean. That is, of course, until your pet or small child finds the missing piece and swallows it. Don’t worry, they could probably use more fiber in their diet any way.
Step 3: Sort out the straight edge pieces from the rest. Seriously, I’m not joking here. Everyone knows that this is the proper way to commence puzzle building. Any other way will be shunned. Shunned I tell you.

Step 4: Build the border of the puzzle. Use all of those straight edges that you sorted out. You will likely have to search for more straight edges, they’re elusive little buggers. You’ll probably have to rebuild some of the frame because you thought that you had all of the pieces and you were putting things together that didn’t belong. Try not to tear the nub of the puzzle piece off as your twisting it from its improper mate. Be more careful next time.

Step 5: Separate the remaining puzzle pieces into piles of like patterns and colors, just because it makes my little obsessive-compulsive heart sing. If you have built puzzles in the past by just diving your hand in and picking up a random piece as though it were a bag of potato chips, never find anything that fits together, give up and then go get a real bag of potato chips…this is the reason why puzzle building has been a source of frustration for you. Give the puzzle the respect it deserves and follow the system you animal.
Step 6: Choose a pile and start putting those pieces together. Starting with a pile that matches a section of the border is always a good way to go. Start from the border and work your way in. If you have a subject in the puzzle such as a person or animal it’s also an option to build the face and work your way out (that’s what I did with this puzzle). Continue to do this until you’ve used all of the pieces to copy the photo on the box.
Step 7: Put in the last piece of your puzzle.

Congratulations. Your puzzle is now complete. The world will begin to make sense to you now. Do a celebratory dance.
Yes. Puzzles are awesome.
The End.
A “Puzzling” Birthday Tradition
I love puzzles. Building puzzles is something that my mom and I have always loved to do together. When I saw that ArtsCow.com was offering 200 piece photo puzzles for $9.99 shipped…I knew I had to get one made for Adaline’s birthday. I chose the following photo from her birthday party.

I received the puzzle in the mail a few days ago. I decided to build it to make sure all of the pieces were there. Here’s the final result.
Yay, all the pieces were there! I think this is something that I’d like to do for birthdays every year (and maybe Christmas too!). (Once they’re old enough) during the month leading up to the child’s birthday they can build their different birthday puzzles. Hopefully they’ll enjoy building puzzles with their mommy as much as I did! If not, I guess my mom and I will just build them anyway in honor of the birthday kid.
My only problem with the puzzle was that it didn’t come with a box. I didn’t know that. It didn’t say anything about a box, but I just assumed (my first mistake). It didn’t even come in a box, it was shipped in a bag. And the bag isn’t even a resealable one 😦

Right now I’m keeping it in a zippered plastic bag. I’m wondering if I should try to find/make a box to resemble a puzzle box or just do a plastic container with a copy of the photo on it. Any suggestions?
If you are intrigued with how I was able to solve this mind-boggling 200 piece puzzle you might want to check out Pointless Tutorials: How to build a jigsaw puzzle so that you too can become a puzzle building mastermind like myself.
Good day to you.
P.S. I’m sorry to tell you that the $9.99 shipped deal for the puzzles is over now. They always have something going on sale, so if you’re interested sign up for their emails.
Posts COMING SOON…
Balloon Wreath Tutorial and Links Post
Ladybug Picnic Centerpiece Tutorial
Free Ladybug and Bug Fonts Links Post
Ladybug Picnic Products List
(I’ll be creating a separate post that contains all of the info and links for the supplies from this party. In the meantime if you want to know where I got something just ask in the comments.)
Related Posts
BIRTHDAY TRADITIONS
*Birthday Traditions: Personalized Birthday CD
*Birthday Traditions: Knife and Cake Server
*Birthday Traditions: Professional Photos
*Birthday Traditions: Photo Puzzle
*Happy 2nd Birthday, Adaline!
BIRTHDAY TUTORIALS
*DIY No Sew Party Hat Tutorial

*Ribbon Topiary Video Tutorial (Centerpiece)

*Tissue Number Birthday Sign (Mini-Tutorial)

BIRTHDAY PARTIES
*Birthday Girl…2 years old: Photos of Adaline at her birthday party
*Ladybug Picnic: 2nd Birthday

*Pink and Green Polka Dots and Cupcakes Party: 1st Birthday

*Ham and Man Party: 30th Birthday

*Celebrating 30 years in 30 days! All of my birthdays from 1980-2009
+Birthday posts will be published all throughout September 2011 including tutorials, party decor ideas, and birthday traditions!

Coolest Family on the Block is committed to helping you find creative ways to have fun and make memories with your family all year-long. Don’t miss an idea, tip, or trick…subscribe and have updates sent directly to your email!


Adaline’s Nursery
I thought I’d share some pictures of Adaline’s nursery. These pictures were taken a few weeks before she was born. In the past year we’ve made some changes, the biggest of all being that you can’t keep a room quite that tidy with a 12 month old walking around in it. For the nursery I wanted something pretty and girly without it being too babyish. I wanted her to be able to grow into it and be able to change it easily if we needed to. I didn’t want to get a bunch of “nursery” items that would no longer be appropriate for a “big girl” in a few years. We ended up with what I think is a sort of shabby chic look in pink and green. I just hope she likes pink when she gets older 😉
(Click photos to enlarge.)


The crib area


The crib was given to us by some wonderful, generous friends. The crib bedding was a gift from my mom and mother-in-law. It’s the Isabella crib bedding set by Glenna Jean. Hanging on the wall above the bed is the quilt that came with the set. I knew we couldn’t put it in the crib with her and I didn’t want it to go to waste, so we hung it above the crib. We moved the bumper once Adaline was born and put it underneath the crib decoratively. The mobile was a gift from my sister-in-law and is also a Glenna Jean, however, it is part of the Story Time collection because I thought the teddy bears on the Isabella mobile were kinda scary. To the right of the crib is a “There’s no place like home” sign from The Hobby Lobby.
The Changing Area
We got the changing table at Target. I purposely wanted something without drawers so that the diapering stuff would be easily accessible. I also wanted something with built in straps so that I would have a way to secure the baby. I know that a lot of people don’t use a changing table, but it ended up being a big help for me. I had a cesarean and it was too hard for me to get up and down from the floor and I couldn’t twist properly to change her on a sofa or bed. I also have a dresser/changer that was part of my baby furniture that my mom had saved. I put it in our family room downstairs and it was great for changing her and for storing baby junk without it cluttering up the living space. The changing pad is from Babies R Us. I got the baskets at Michael’s.


The black and white bunny on the left and the black and white “Faith” blocks were from the Hobby Lobby. The bunnies on the right were from a local hobby/antique shop. The rose topiary is one of the centerpieces from our wedding. The Wish Sister was a birthday gift for me from my dear friend, Sara. The “I love you to the moon and back” sign was from Kirkland’s. The little lamb is a Boyd’s that I’ve had for years. The framed outdoor scene is a chalk drawing my sister made for me when she was about 10 years old. It hung in my bedroom until I got married and now it’s in Adaline’s nursery. The “Diamonds may be precious but daughter’s are priceless” photo frame is from The Hobby Lobby. It contains one of Adaline’s 3D Ultrasound images from 33 weeks.
The three hanging letters with scripture “Pray, Daughter, Blessings” were from a Bible bookstore.
The closet area
The dresser is from my set of furniture when I was a baby. Yes, it’s held up 30 years. Over to the right is a set of handprint kits that was a gift from my mom. Each tin includes the materials to make a handprint impression from ages 1 to 5! We still need to do Adaline’s first year handprint…something we haven’t had the chance to get around to yet. The princess piggy bank was a gift from my sister-in-law. I think that the metal “Dream” box was from Michael’s. The bear plays a recording of Adaline’s heartbeat when she was 33 weeks in utero. When we play the recording for Adaline now, she thinks it’s a song and she starts dancing to it. So cute!


The Philippians 4:8 sign is from The Hobby Lobby. The pink baby sign and baby quote beneath it are from Kirkland’s. The wreath on the door was another centerpiece from our wedding (used as a candle ring for hurricane lamps). The “For this child we prayed…” plaque is from Family Christian Stores. The white photo frame from Babies R Us contains an ultrasound from each trimester. I saw the growth chart at The Hobby Lobby and bought it before I was even pregnant. The basket is from Michael’s.
The rocking area
The glider/recliner from USA Baby was a gift from my mom, sister, and brother-in-law. Getting the fabric was a whole ordeal and a blog for another time. Just know that I wanted it to be green and fabric that I ordered was discontinued…twice. The adorable bear on the glider, Honey Jo, has been my pal for over 20 years.
We found the toile fabric for the valances online. It’s the same pattern that’s on the Isabella bedding. The valances were made by my awesomely talented friend, Sara, who also made the rockin’ Happy Birthday sign for the front of the house on Adaline’s birthday. Because I thought the walls and valances were a little too much pink we got paint and sponges at a craft store and added the stars above all of the windows. There’s also a star pattern in the Isabella bedding. I loved the way they turned out.


The wall décor pictured here was from The Hobby Lobby, Kirkland’s, and a Bible bookstore. The rocking and changing areas were one of the things that got moved around. We ended up needing more floor space for a swing and jumperoo so we had to move some things.
The book and door area
The “Child of God” sign is from The Hobby Lobby. The swag above it is actually another of the flower ring centerpieces from our wedding unbent.
Although you can’t tell in the photo the switch plate has the same toile pattern as the valances and Isabella bedding in green.
The shelves used to hang in my sister’s bedroom. The book shelves had been sitting around my mom’s attic for years.

You may remember these black ceramic letters that spell Adaline from the mantel display at her first birthday party. On the other shelf they spell out her middle name, Rose. I found these letters at the Hobby Lobby. The “Faith” box and wall décor were from Michael’s, The Hobby Lobby, and Kirkland’s respectively. The bunny and lambs had been mine for years. I got the cute little round bunny box at a local hobby/antique store. The round box was from Michael’s, the “Love” blocks from The Hobby Lobby, another of my own bunnies, and another topiary centerpiece from our wedding. The nursery rhyme prints I found at Wal-Mart for $1.00 years ago when we first got married. We used scrapbook paper to matte them and I believe those frames were from something else that we no longer had on display.


The giraffe was a gift from my mother. The brown bear was my very first teddy bear. The Cinderella book (and Mother Goose book on the shelf beneath it) was from a local hobby/antique shop. The box was from Michael’s and the bear is Adaline’s first bear. Cool Daddy got it for her at Babies R Us. Most of the books and Bibles on the shelves we already had. The baby doll was part of my doll collection as a child.
The cute wire table is from The Hobby Lobby. The stuffed bunnies were mine (Cool Daddy has gotten me one for Easter every year since we first started dating). The box they are sitting in is the box that her teddy bear came in. The pink poodle, FiFi, has been mine for about 20 years.

Everything from The Hobby Lobby, Kirkland’s, and Michael’s was 50% off or on some kind of sale or clearance. Many of the items were reused or repurposed items that we already had. Many things were gifts. Very few items were purchased brand new at full price. Some things that aren’t “babyish” and that aren’t particularly pink or girly can be used as she grows older or used elsewhere in the house if her color scheme changes. I’m sure hoping that she’d like to keep it like this for awhile. I hope you enjoyed it!
**A VERY special thank you to my mom. While I hand-picked everything that went into the nursery my mom was the one that put it all together. I was pregnant and huge and she did all of the decorating for me. THANKS MOM!**
*Open House: Adaline’s Nursery
*Open House: Dominic’s Nursery
This post is linked to 4 Moms Open House
+Smockity Frocks
+Life in a Shoe
+The Common Room
+Raising Olives
I’m not a “mom of many” (unless you consider one “many”), but I love reading about these ladies and their families.
Celebrating 30 years in 30 days
My birthday happens to be on the 30th of September. I also have happened to have had exactly 30 birthdays so far. From September 01 to September 30 I’ll post about my birthday every year until now (2010).
I don’t actually have photos from every birthday and I didn’t have a party every year (especially once I “grew up”), but I’ll post something related daily.
1980: Woodland Critters Theme
1981: Holly Hobbie Theme
1982: Wizard of Oz Theme
1983: Castle/Fairytale Theme
1984: Herself the Elf Theme
1985: Unicorn Theme
1986: Party at Hoss’s
1987: Sleepover
1988: Sleepover
1989: 10th Birthday Party (no theme)
1990: No party (Click here for Sugar and Spice 2nd Birthday)
1991: No party (Click here for Mickey Mouse 4th Birthday)
1992: Sleepover 13th Birthday
1993: Surprise Party 14th Birthday (no theme)
1994: No party (Click here for 15th Birthday details)
1995: Sweet 16 Party (no theme)
1996: Sleepover 17th Birthday (no theme)
1997: 18th Birthday: No party
1998: 19th Birthday (no party)
1999: 20th Birthday (no party)
2000: 21st Birthday (no theme)
2001: 22nd Birthday (no theme)
2002: 23rd Birthday (no party)
2003: 24th Birthday (no party)
2004: 25th Birthday (no party)
2005: 26th Birthday (no party)
2006: 27th Birthday (Shopping Day!)
2007: 28th Birthday Princess Theme (kinda)
2008: 29th Birthday (no theme)
2009: 30th Birthday Totally 80s Theme
2010: 31st Birthday (no theme)
Related Posts
*My Birth Story:
The oh-so-interesting story of how I entered the world!
*Liar, Liar, Pants on Fire!:
I lied about my 5th Birthday to a classmate
BIRTHDAY PARTIES
*Birthday Girl…2 years old: Photos of Adaline at her birthday party
*Ladybug Picnic: 2nd Birthday

*Pink and Green Polka Dots and Cupcakes Party: 1st Birthday
*Ham and Man Party: 30th Birthday
*Celebrating 30 years in 30 days! All of my birthdays from 1980-2009
BIRTHDAY TUTORIALS
*DIY No Sew Party Hat Tutorial
*Ribbon Topiary Video Tutorial (Centerpiece)
*Tissue Number Birthday Sign (Mini-Tutorial)
BIRTHDAY TRADITIONS
*Birthday Traditions: Personalized Birthday CD
*Birthday Traditions: Knife and Cake Server
*Birthday Traditions: Professional Photos
*Birthday Traditions: Photo Puzzle


%20%23birthday%20%23traditions%20)

)


