
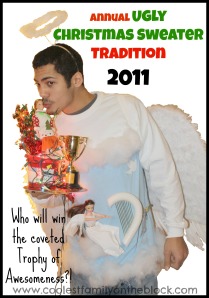
Uncle Ugly’s Christmas Sweater Jamboree 2011
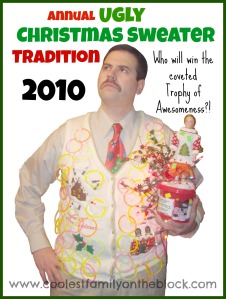
In 2010 our family started a new Christmas Eve tradition: Uncle Ugly’s Christmas Sweater Jamboree, which is just a fancy way of saying “Ugly Christmas Sweater Competition”. It was a hit and my very own Cool Daddy came away as the victorious champion!
%20%23christmas%20%23tradition)
For 2011 some contestants upped their game, others dropped out altogether (party poopers).


Let’s start things off with a group photo of the cool family.


Here is Cool Daddy, last year’s Ugly Christmas Sweater Champion. We were all relieved that he chose to ditch the creepy mustache from last year.
It’s difficult to describe what’s happening with his sweater, because I honestly don’t know. He’s sporting a lovely lady’s sweater vest with flashing snowflake lights on one side and candy cane garland on the other. Look closely and you will see a gold and a red tinsel tree on either of his shoulders (blends into the background, boo!). He added some Christmas underwear from the Dollar Tree because…well, I don’t know. I have no idea why anyone would pin underwear to their sweater, but it happened. I apologize.
He paired his sweater with some Christmas tree pajama bottoms and a snazzy plastic candy cane cane. Yes, a cane cane.


Here I am rocking an ugly Christmas sweater, maternity style! I was almost 8 months pregnant with Jonathan.


I trimmed a red sweater vest with tacky multi-colored disco ball garland. My baby bump is adorned with a Christmas wreath with flashing snowman lights. The wreath is topped with double bow goodness, a giant felt red bow and a giant shiny silver gift bow. A Santa Claus stocking on the side is the perfect place to tuck the battery pack from the lights.


In 2010 my sister totally flaked out on the sweaters and barely participated. This year she wore a red sweater, which was an improvement. She altered the sweater by writing “Merry Christmas” in magic marker and attaching a baby onesie, or is it a dog shirt? She’s wearing a baby bib around her neck. Why? I don’t know. I’m confused by the whole thing. Perhaps the “bah humbug” on her shirt is the key to it all. I do enjoy her headgear which is actually a tissue box cover.


Last year after my sister dropped the ball my brother-in-law was stuck with a completely un-Christmasy sweatshirt. He did bring home the title of “Most Naturally Ugly Sweater” in 2010 because his was the only one completely unaltered. In 2011 he was in it to win it. This completely unaltered black sweater vest has charming plaid accents that add country appeal. The sweater is perfectly complimented by a turtleneck covered in poinsettias on a field of green.


My mom is stuck on Christmas in this red sweatshirt accented with puffy Christmas stickers in the shape of a Christmas tree. The children had taken quite a few of her stickers off of her shirt before I could get a picture. A sticky situation to say the least! (bah-dum-ching)


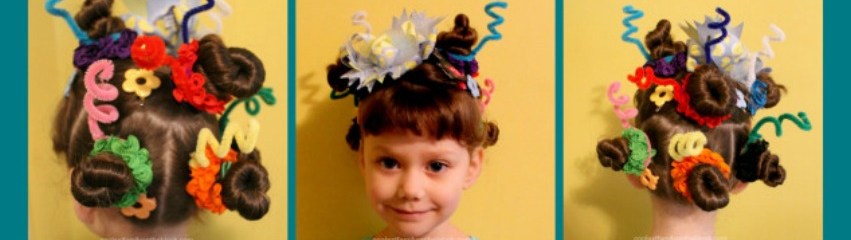
My cousin, Ben, took the loss hard last year. He had come with his game fast on, an entire Christmas tree on his chest, and presents on his feet and he still failed to bring home the title of “Ugly Christmas Sweater Champion”.
In attempt to keep history from repeating itself, Ben kicked things up a notch with this celestial beauty. A swatch of blue framed in fluffy fiber fill is the perfect heavenly background for this dollar store plastic doll posing as an angel. Perched on a tuft of cloud she is just out of reach of her harp made of Styrofoam. She is accompanied by a few other heavenly hosts and doves. Accessories include a marabou halo, angel wings, and puffy cloud shoes.


My cousin Aunia is a brick house, or at least her sweater is. Strategically placed strips of white foam on a red shirt creates the illusion of bricks. In the center sits a door decorated with a lovely lit wreath. That’s not all…open the door to find a festive living room complete with Christmas tree and presents! Ugly or adorable?


Now is your last chance to guess who was the winner of the 2011 Ugly Christmas Sweater Contest.
Click below if you need a refresher on the rules.
Announcing the 2011 Ugly Christmas Sweater Contest Winners…


Ben was more than pleased to earn the title of Ugly Christmas Sweater Champion. My baby bump and I waddled away with the title of “Most Overall Festive Attire”, and Matt claimed the title of “Most Naturally Ugly Sweater” for the second year in a row.


Just a boy kissing his trophy. Nothing to see here, people, move along.


Which sweater gets your vote for ugliest? (Mine!)
Does your family have an Ugly Christmas Sweater Tradition?
![]()


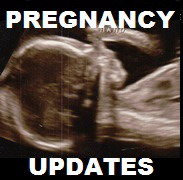
Third trimester already?
I hit the 28 week mark on Sunday, so I’m now officially in my 3rd trimester! Here’s what I’ve been up to (pregnancy-wise) during the past 8 weeks since my last update.
I was 20 weeks on 09/18/2011 and the following day we found out that our little one is a boy! 🙂 A few days later I had a prenatal appointment. Everything looked good and baby’s heart rate was in the 150s.
This is how Cool Mama rocks an OB appointment…
(09/22/2011 20 weeks 4 days)


On 9/30 I turned 32. That has nothing to do with the pregnancy, I just never bothered to blog about it and thought I’d mention it.
(09/30/2011 21 weeks 4 days)

(10/02/2011 22 weeks)


(10/09/2011 23 weeks)

My sister was taking these photos and she said, “You’re boring just standing there…do something.”
This is what I came up with…

It’s also a cruel joke that my wedding photo is visible in the background when I was 8 years younger and 40ish pounds lighter.
Around 23-24 weeks the rib and back pain started. It’s only the right rib (mostly when I sit working at the computer desk for hours) and my back pain is on the upper right side. I had the same pains only on the same side while pregnant with Adaline, however the pain with her was more constant.
(10/15/2011 23 weeks 6 days)
Click here for more photos of me in the pumpkin shirt. You know you want to.

(10/16/2011 24 weeks)


Around 24 weeks I had another OB appointment. Baby’s heart rate was good again although they didn’t tell us a number. Adaline came with us to this appointment and the OB I was meeting this time was the one that delivered Adaline in 2009. Adaline was a very good girl during the appointment.

This OB (who I’ve taken to calling Dr. Sunshine…sarcastically) spoke to me briefly about my desire for a VBAC. To make it short she basically said that I can try for a VBAC but that my daughter was a big baby and chances are this baby will be big too and I may end up with another c-section. Mmm-kay.

After the appointment they let Adaline choose a toy to take home. She chose a small yellow Frisbee with a dinosaur sticker on it. In the car on the way home she says, “Thank you for the…what is this?” 🙂
At my 24 week appointment I wasn’t thrilled with my 7 pound weight gain, although no one seemed concerned with it. I started doing some prenatal exercise dvds. In the past four weeks I’ve done 8 days of prenatal aerobic, 5 days of prenatal sculpting/strength, and 5 days of prenatal yoga. I can only work out once Adaline is in bed so I don’t have a real schedule going yet, but my goal is to do aerobics 5 days a week and strength and sculpting 3 days a week. For weeks now my weight has stayed the same (although my belly is definitely growing) but all of the sudden yesterday I weighed in 5 pounds heavier than the rest of the month! Seriously, 5 pounds in one day? I hope my scale’s just wonky.

(10/30/2011 26 weeks)

Last Tuesday I had my 1 hour glucose tolerance test. The stuff that they gave me to drink was a bright red fruit punch flavor. I decided to check the ingredients while I was drinking and sure enough there was the artificial color Red #40 in it. That kinda really irritated me. I’m a grown woman who could care less about the color of the nasty stuff you’re making me drink. Is it really necessary to put fake junk in my body so that we can all pretend that it’s red? I don’t get it. Anywho, I’ll get my results at my OB appointment tomorrow.
This month I interviewed a couple of doulas and I made a decision over the weekend. I’m so excited about having doula for this birth. It makes me feel much more confident that I can achieve a successful VBAC. Yay for me!
Now I shall leave you with the lovely weekly belly shots from my entire 2nd trimester. I’m sure you’ll want to set this as your computer wallpaper (um, please don’t…creepy stalker!)
(Click photos to enlarge)

Proof that my belly is really that big…

Related Posts
Click for the latest pregnancy news
Preconception / Trying to Conceive
*Our Infertility Story: The Short Version
*Trying to Conceive: Take 3 (Secondary Infertility)
*Trying to Conceive Tuesday (Take 3 Continued)
First Trimester
*Wordless Wednesday: Two Lines
*Early Ultrasound 7 Weeks 2 Days
*Early Ultrasound 9 Weeks 2 Days
*The Night I Got Arrested and Changed My Name to David (not really): A trip to the ER, Ultrasound 11 Weeks 4 Days
*NT Ultrasound 12 Weeks 4 Days
Second Trimester
*Half Way There! 20 Weeks
*It’s a…
*Wordless Wednesday: Is That a Pumpkin Up Your Shirt?
Cool Baby Boy due 02/05/2012
(Clomid baby) VBAC hopeful 🙂

Coolest Family on the Block is committed to helping you find creative ways to have fun and make memories with your family all year-long. Don’t miss an idea, tip, or trick…subscribe and have updates sent directly to your email!


Celebrate 11-11-11 this Friday
Friday is 11-11-11! Start celebrating at 11:11am (and keep it up until 11:11pm if you’re a real party animal) and check out the following link for ideas on how to celebrate the day.
11 Ways to Make the 11th Magical
Here are some crafts and activities involving numbers that you may want to incorporate into your celebration.
*Number Buddies: Number One Craft: @ dltk-teach

*Number 1 and Circles: @ Our Crafts N Things

*One Red Circle: @ Our Crafts N Things

*Number Portrait: @ First Palette
Compose a portrait using the digits 1 to 7 in this numbers-themed craft. This would definitely be more challenging only using 1’s! You could maybe throw 2 and 0 in there for 2011, or simply use numbers 1-11 instead of stopping at 7 😉

I’m in a bit of a creative slump right now, so if you have more ideas on how to celebrate the 11th let me know in the comments!
Coolest Family on the Block is committed to helping you find creative ways to have fun and make memories with your family all year-long. Don’t miss an idea, tip, or trick…subscribe and have updates sent directly to your email!
Awesome Halloween Light Shows
I saw this first video on Facebook, so I looked it up on You Tube and was thrilled to find a bunch of similar videos. I’m not a fan of Halloween, but I am a fan of awesomeness…so here are some videos of awesome Halloween Light Shows.
(Email and feed readers, please click the links below or click through to the blog to view the videos.)
Halloween Light Show 2010: Thriller
Halloween Light Show 2010: Monster Mash
Thriller Halloween Display 2009
Ghost Busters Halloween Display 2009
Halloween Light Show 2010: Thriller
I had to narrow the list down somewhere, but you can find even more videos like this by doing a You Tube search for “Halloween Light Shows”.
Free Ladybug Fonts (Links)
I thought I’d share with you some of the free Ladybug fonts and bug fonts that I found online while planning Adaline’s Ladybug Picnic. I did not create or design any of these fonts, this is just a list of links to the sources where I found and downloaded the fonts for free.
In addition to free ladybug fonts I’ve included free bee fonts, free butterfly fonts, and other free bug/insect fonts.

)
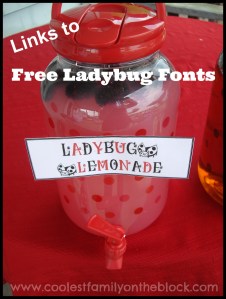
I found all of the Free Ladybug Fonts below at EverythingLadybug
Font: KR Ladybug True Type Font

I used the above font for a Ladybug Lemonade label. The other ladybug on there are the Ladybug Dings True Type Font (Captial N).
)
Font: 101! Lady Bug Luv True Type Font

Font: Ladybird True Type Font

Font: Ladybug Dings True Type Font

Font: Ladybug Italic True Type Font

I used the above font for my Ladybug Picnic sign

Font: LMS Ladybug True Type Font

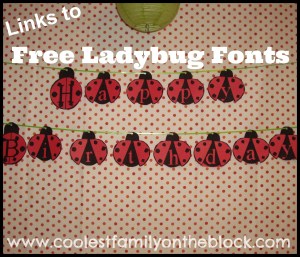
Font: LMS London Bugs True Type Font by London’s Letters @ FontSpace.com

I used the above font to create a Happy Birthday banner.
Font: LMS Ladybird True Type Font

Font: Flag waving ladybug True Type Font

FREE BUG FONTS
In addition to the fonts below more free bug and insect fonts can be found at FontSpace.com/category/insects
Font: Picnic Parade by London’s Letters @ FontSpace.com
![]()
Font: KR Ants by Kat’s Fun Fonts @ FontSpace.com
![]()
Font: Ant Pile @ Font-Zone.com

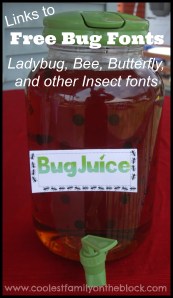
Font: a bug’s life by Filmhimmel @ dafont.com
a bug’s life by 
I used the above font to create a Bug Juice label for the iced tea. The surrounding ants were made using the Ant Pile font (left to right: Lower case a, lower case d, upper case C).
Font: KR Cute As A Bug Font by Kat’s Fun Fonts @ 1001fonts.com
![]()
Font: LMS Yes Young Grasshopper by London’s Letters @ FontSpace.com
![]()
Font: Along Came a Spider by Kat’s Fun Fonts @ FontSpace.com
![]()
FREE BEE FONTS
In addition to the fonts below more free bee fonts can be found at FontSpace.com Search: Bees
Font: Hunny’s Bees by Barb Johnson@ FontSpace.com
![]()
Font: Bees by Lady Sara @ FontSpace.com
![]()
Font: Sssssum by Dingfontbats @ FontSpace.com
![]()
Font: JLR Bizzy Beez by GorillaBlu @ FontSpace.com
![]()
Font: KR Buzzzz by Kat’s Fun Fonts @ FontSpace.com

Font: LMS Spelling Bee by London’s Letters @ FontSpace.com

Font: D3 Honeycombism by Digitaldreamdesign @ FontSpace.com

FREE BUTTERFLY FONTS
In addition to the fonts below more free butterfly fonts can be found at FontSpace.com/category/butterflies
Font: KR Butterfly by Kat’s Fun Fonts @ FontSpace.com
![]()
Font: KR Butterfly Two by Kat’s Fun Fonts @ FontSpace.com
![]()
Font: KR Butterfly Three by Kat’s Fun Fonts @ FontSpace.com

Font: Butterfly Letters by Darrian Lynx @ FontSpace.com
![]()
Font: Butterfly Chromosome by Astigmatic One Eye Typographic Institute @ FontSpace.com
![]()
Font: LMS Beautiful Butterfly by London’s Letters @ FontSpace.com
![]()
Related Posts
Ladybug Picnic: 2nd Birthday / Free Dr. Seuss Fonts


DIY No Sew Party Hat Tutorial
For Adaline’s 2nd Birthday Party I decided to try to make her party hat myself. Even though I knew she wouldn’t keep it on her head and I probably wouldn’t even get any decent pictures of it…every little kid should have a party hat for their birthday!
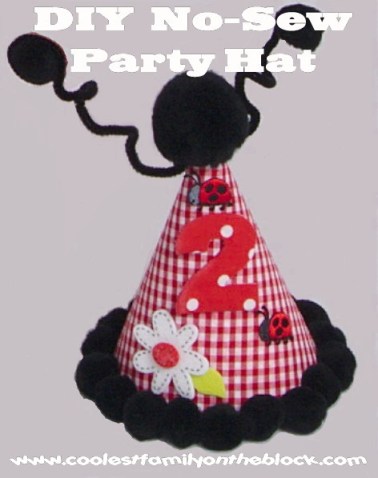
I do not sew and I’m not really crafty, so I came up with a fairly easy no sew party hat. The whole idea is to get any cardboard party hat and cover it with either scrapbook paper or fabric to match your party theme and then add embellishments.

Supplies you will need:
(2) Cardboard party hats
Fabric or Scrapbook Paper
Hot Glue Gun (and Glue Stick if you’re using paper)
Scissors
Chalk
Ribbon
Embellishments (Pom Poms, feathers, etc.)
Step 1: Trace and Cut
-Carefully unravel one of the cardboard party hats to use as a template
-Set it on the fabric/paper and trace around it. Be sure to trace a little wider to give you extra room for mistakes. Use chalk for tracing on fabric and pencil for paper…something that can be easily wiped off or erased.
-Cut it out


Step 2: Glue Fabric to Hat
-Adhere the fabric/paper to the party hat that’s still put together.
I used a glue stick for paper and a hot glue gun for fabric.
When using the hot glue gun I pressed things down using a spoon so that I didn’t burn my fingers.
Note: Because I used a designed party hat you could actually see the design through the fabric :(, so I covered the hat with scrapbook paper first and then with fabric.


-Because my “seam” was crooked and I was messy with the hot glue I decided to cover the seam with a ribbon to hide my mess 🙂

Step 3: Glue Trim to Hat
-Using a hot glue gun add your embellishments to the top and rim of the hat. I used pom poms.

Although I don’t show it in the photos, I also hot glued two ribbons to the inside of the hat to tie the hat on in place of a chin strap.

You can stop here or add more personalization to your hat. If you are making hats for all of your guests I would probably just add the chin strap and leave the guests’ hats like this but further personalize the birthday kid’s hat.
Adding a number to your hat (Optional)
Supplies you will need:
-Number template or stencil
-Felt and fabric
-Marker
-Scissors
-Hot Glue Gun

Step 1:
-Trace and cut your felt number.
I didn’t have a stencil, so rather than drawing freehand I chose a size and font and printed out a #2. I then cut out the #2 and placed it on top of the felt. I traced the number with a Sharpie marker because I intended to cover it with fabric. If you’re just going to use the felt be sure to trace out a little further so that you can cut off the marker lines so they aren’t visible.

-Trace and cut your fabric number.
I wanted to add the polka dot fabric to my hat so I chose to cover the felt number in fabric. To do this I traced the cut out felt #2 onto the fabric using chalk and then cut out the fabric.

Next I taped one end of the fabric to the felt (I used sticky back felt so the back was covered with paper. I then hot glued the fabric around the edges of felt trimming away any excess fabric that I didn’t need.

Step 2:
-Hot glue the number to the hat.
To make sure that I put the number right where I wanted it I first used scotch tape to tape it to the hat and then I used chalk to make a few guide marks. Then I hot glued the number onto the hat.


Making a Ladybug Party Hat (Optional)
Supplies you will need:
-(2) Fuzzy sticks (pipe cleaners)
-(2) Pom Poms
-Hot Glue Gun
-Additional ladybug embellishments.
For Antennae I hot glued tiny pom poms to the end of fuzzy sticks. I then twisted the pipe cleaners around the top of the hat under the large pom pon.

I found iron-on ladybugs that had sticky backs at Hobby Lobby. I just used the sticky backs and added them to the hat (you can hot glue to be sure they stick).

I wanted to add a white daisy with red center to match the flowers on Adaline’s dress.

I found these Felties at a craft store (Pat Catan’s).

They had white daisies with yellow centers and yellow daisies with white centers. They had sticky backs and the centers were just stuck to the flowers so I pulled the white center off and colored it red with a Sharpie marker and then put in on the white flower instead of the yellow center. I peeled off the back and stuck it to the hat (you can hot glue to be sure they stick).
The finished product…


Related Posts
BIRTHDAY TUTORIALS
*Ribbon Topiary Video Tutorial (Centerpiece)

*Tissue Number Birthday Sign (Mini-Tutorial)

BIRTHDAY PARTIES
*Ladybug Picnic: 2nd Birthday
*Pink and Green Polka Dots and Cupcakes Party: 1st Birthday

*Ham and Man Party: 30th Birthday

*Celebrating 30 years in 30 days! All of my birthdays from 1980-2009

BIRTHDAY TRADITIONS

*Birthday Traditions: Personalized Birthday CD
*Birthday Traditions: Knife and Cake Server
*Birthday Traditions: Professional Photos
*Birthday Girl…2 years old: Photos of Adaline at her birthday party
*Happy 2nd Birthday, Adaline!
+Birthday posts will be published all throughout September 2011 including tutorials, party decor ideas, and birthday traditions!
Coolest Family on the Block is committed to helping you find creative ways to have fun and make memories with your family all year-long. Don’t miss an idea, tip, or trick…subscribe and have updates sent directly to your email!


%20%23birthday%20%23traditions%20)

)